
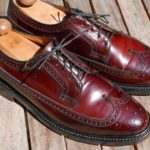
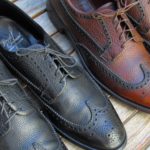
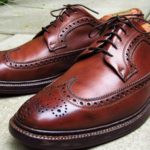
This post might stun you. I took apart a pair of iconic Florsheim Imperial 93605 Kenmoors. It’s not stunning like Weezer covering Toto’s Africa but its close. I know that the 93605 is a “grail” pair for many shoe collectors but this pair was broken. So, don’t be mad. Read on. And bless the rains down in Africa. Gonna take some time to do the things we never had.
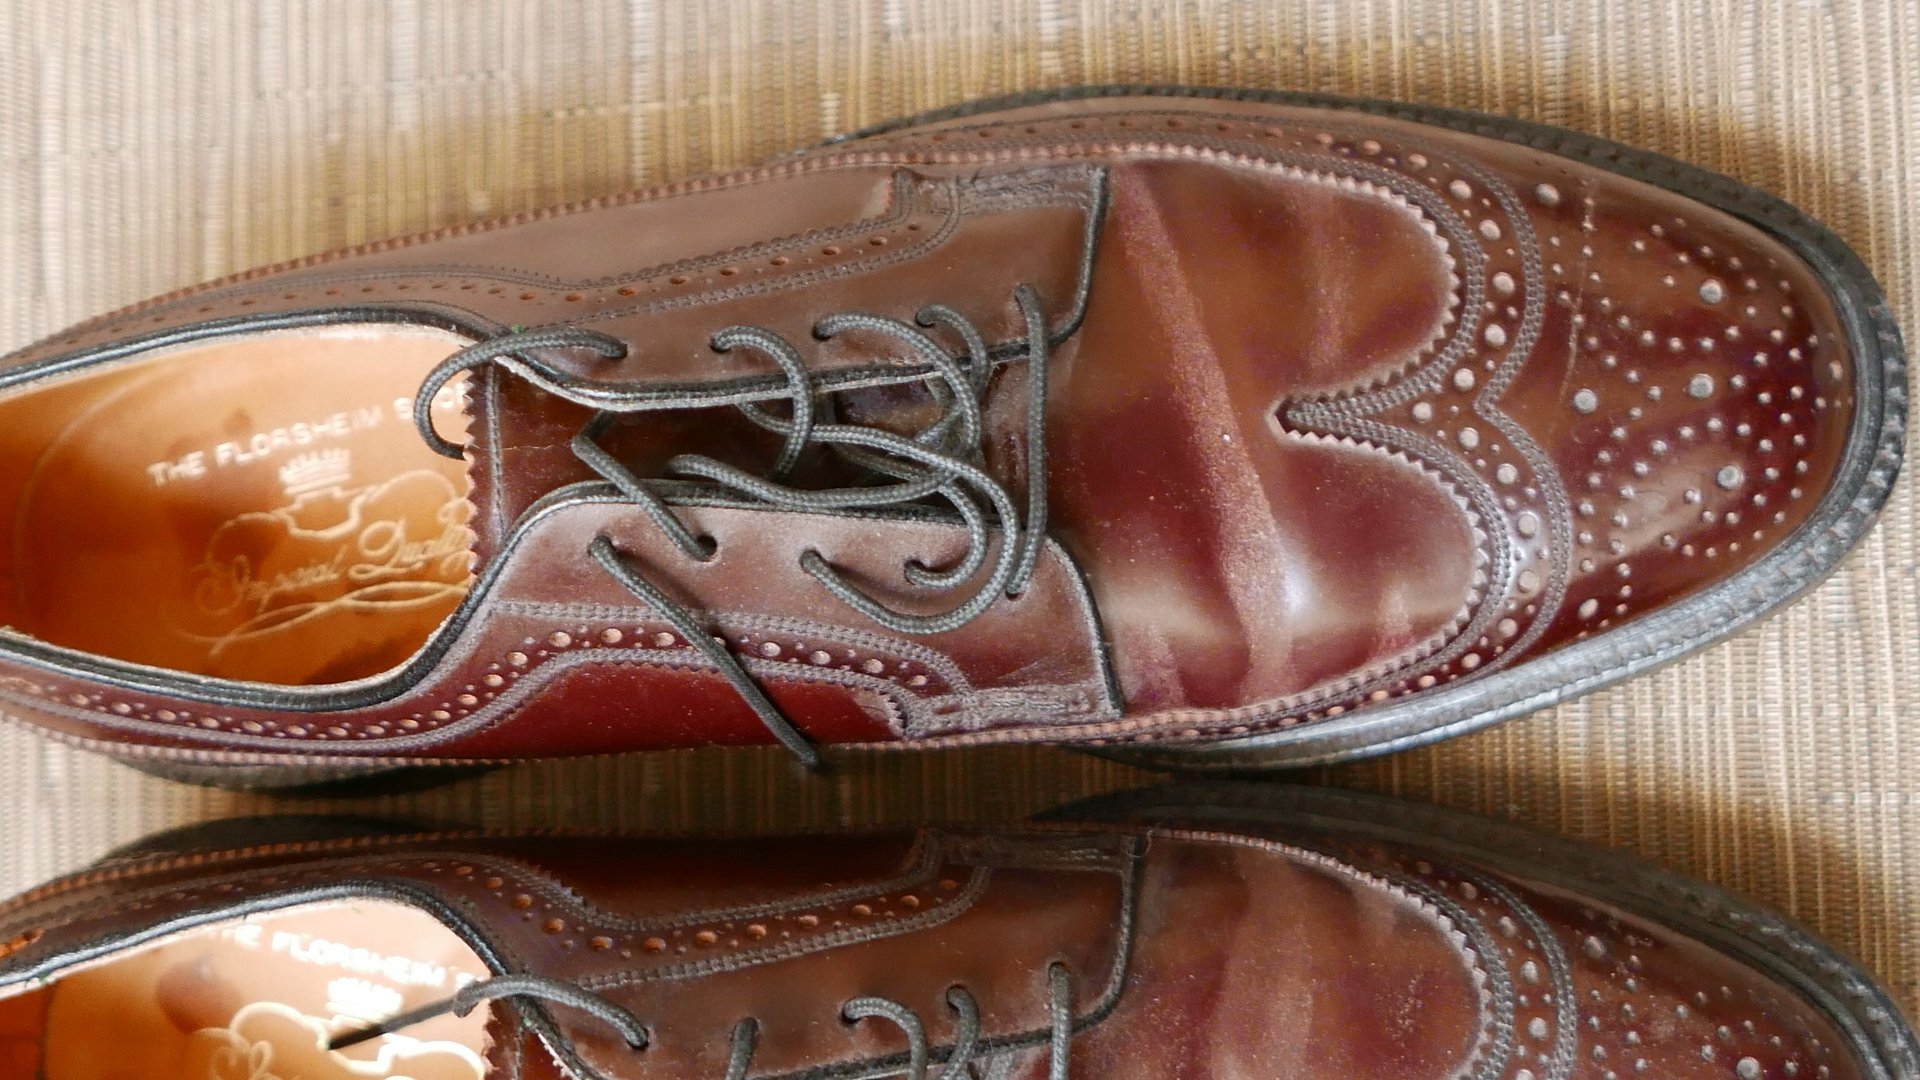
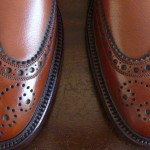
I found this pair last year. It was a 1987 version of the 93605 and barely worn based on the condition of the sole. Since the pair wasn’t my size I thought I could resell them. For mucho dinero. But something was not quite right with the pair, it had a strange crease-like fold across the vamp. If you remember your Shell Cordovan 101 ownership and safety training, the first rule of Shell is that you always talk about Shell. And the second rule of Shell is that you always talk about Shell. And of course, the third rule is that Shell Cordovan doesn’t crease. Thus it was strange that this pair had a crease. The pair was also dirty. That was not strange.

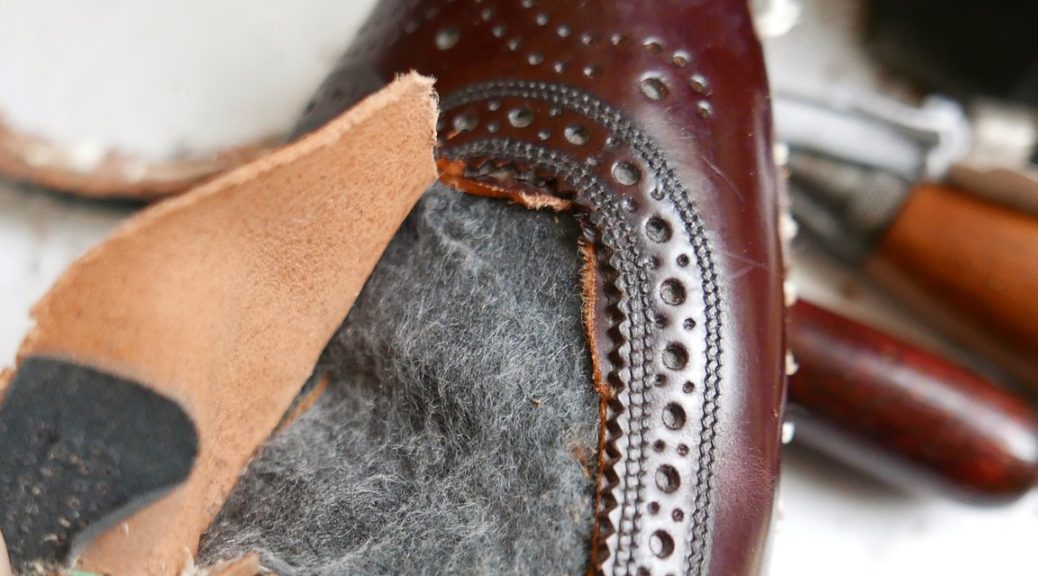
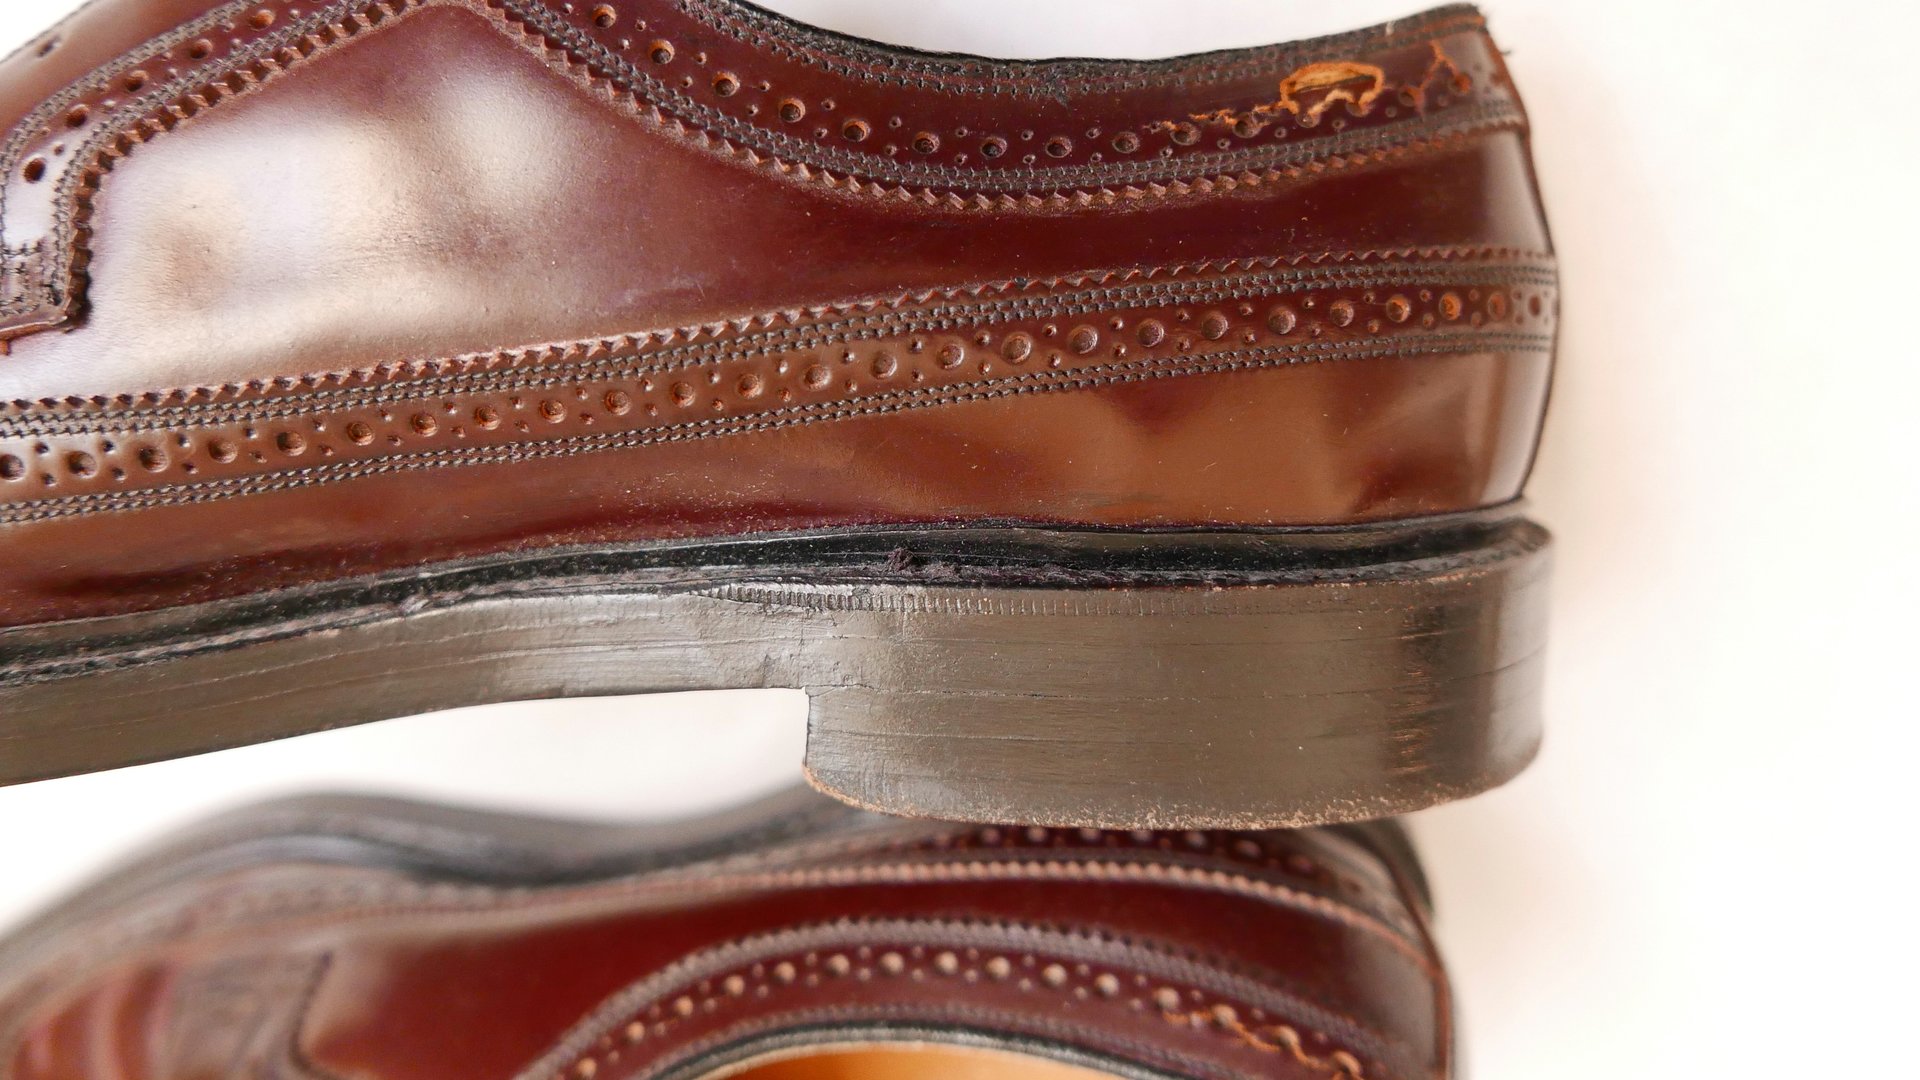
The Shell Cordovan looked dry to my trained eye. I flexed the upper slightly near the shoe mouth and the Shell cracked. The other side was already cracked as well but I hadn’t noticed it. And with those cracks went my dream of a big payday. Back to pressuring friends to buy nutritional shakes. It’s a superfood really. I can provide a free sample. Call me.
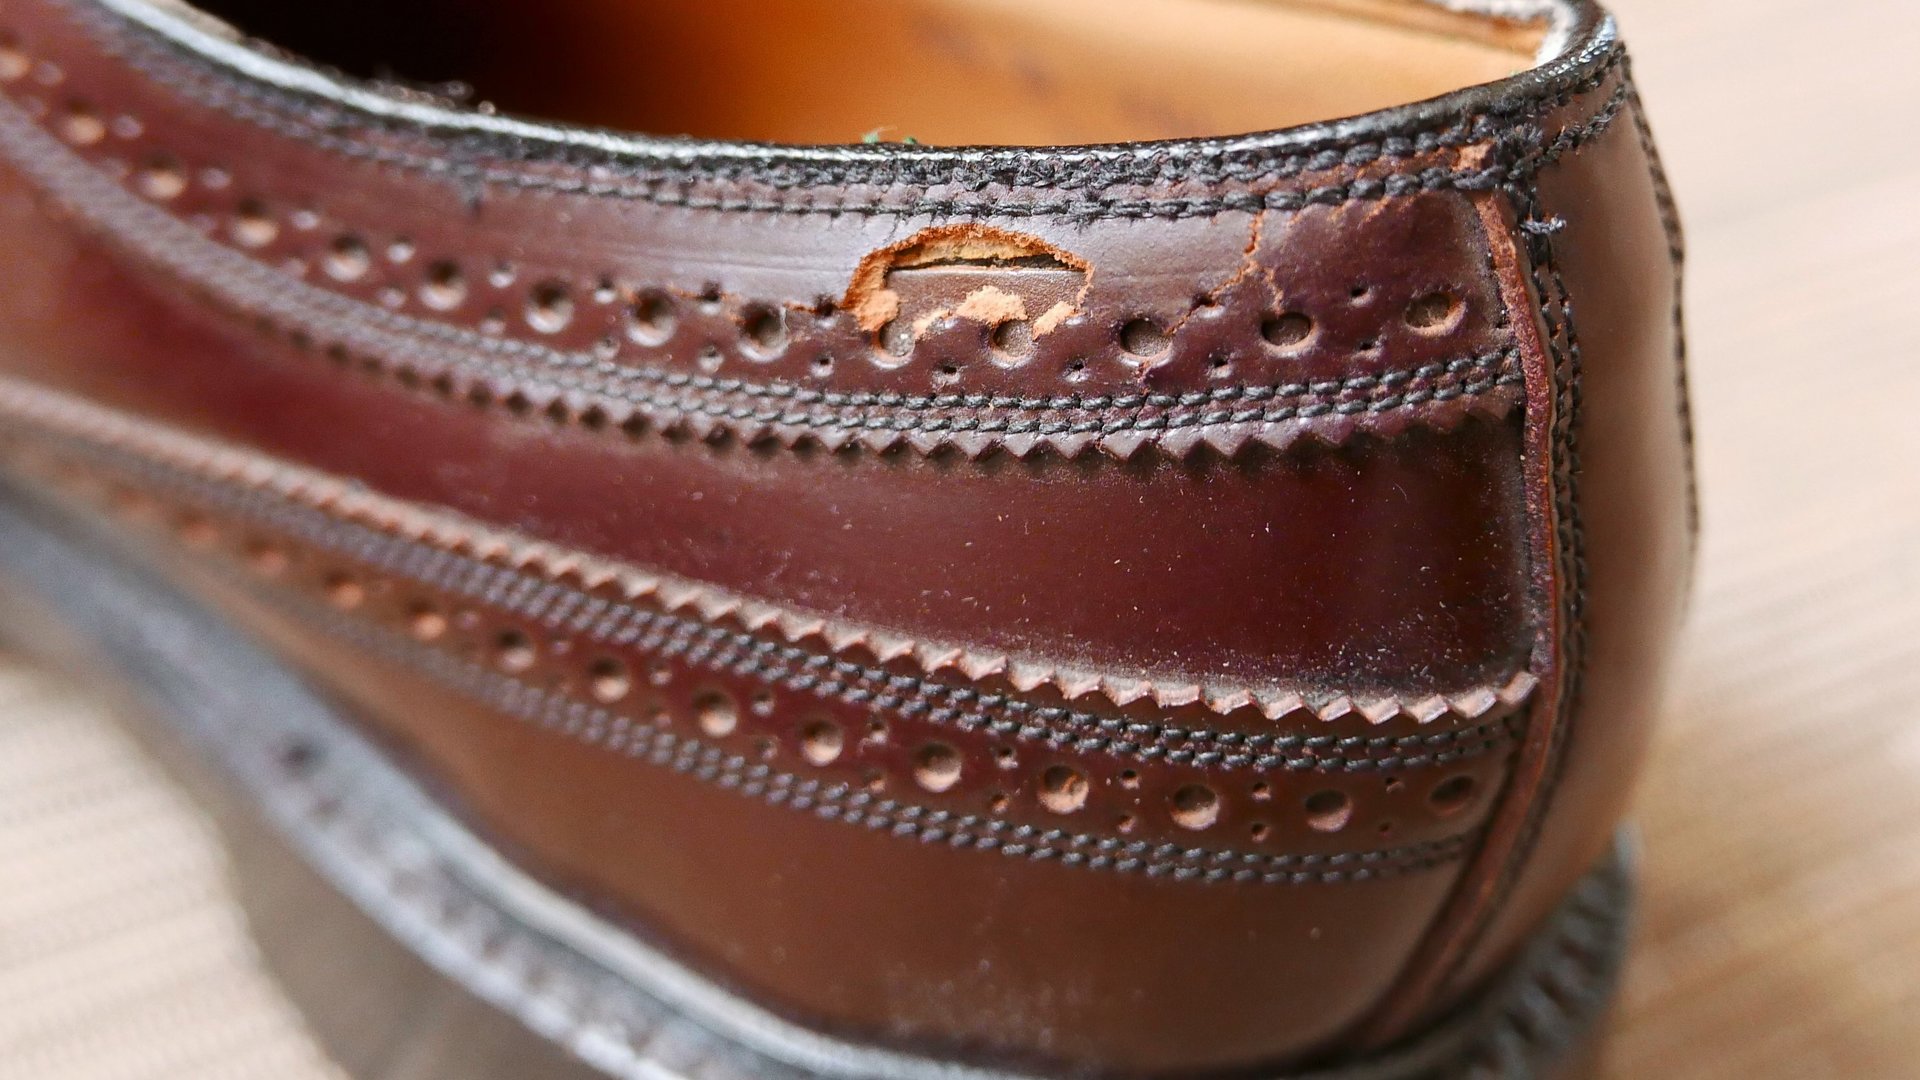
When Shell Cordovan dries out, it can become brittle and crack. The cracking tends to occur in the areas that receive stress such as the heel counter or the eyelets. You can see examples in my guide to buying a 93605. When buying a vintage Shell pair look for damage in these areas. And if you see a crack, you should assume more cracking is likely. You can live with cracked Shell Cordovan uppers but it’s not possible to fix the cracks. There’s nothing that a hundred men or more could ever do.
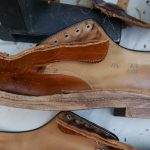
After the cracking incident, these shoes were stored in a box until I had the idea of taking them apart. I wanted to deconstruct them stitch by stitch. A number of years ago, I read an article from ex-Allen Edmonds CEO Paul Grangaard who said that you could completely unstitch a pair of Allen Edmonds shoes and put them back together with new stitching (but I couldn’t find this article)(so I may be lying)(but I believe my lie)(which is the truth). With this inspiration, I armed myself with several vintage leather tools, a shoe anvil, a box cutter, and went to work taking the shoes apart.
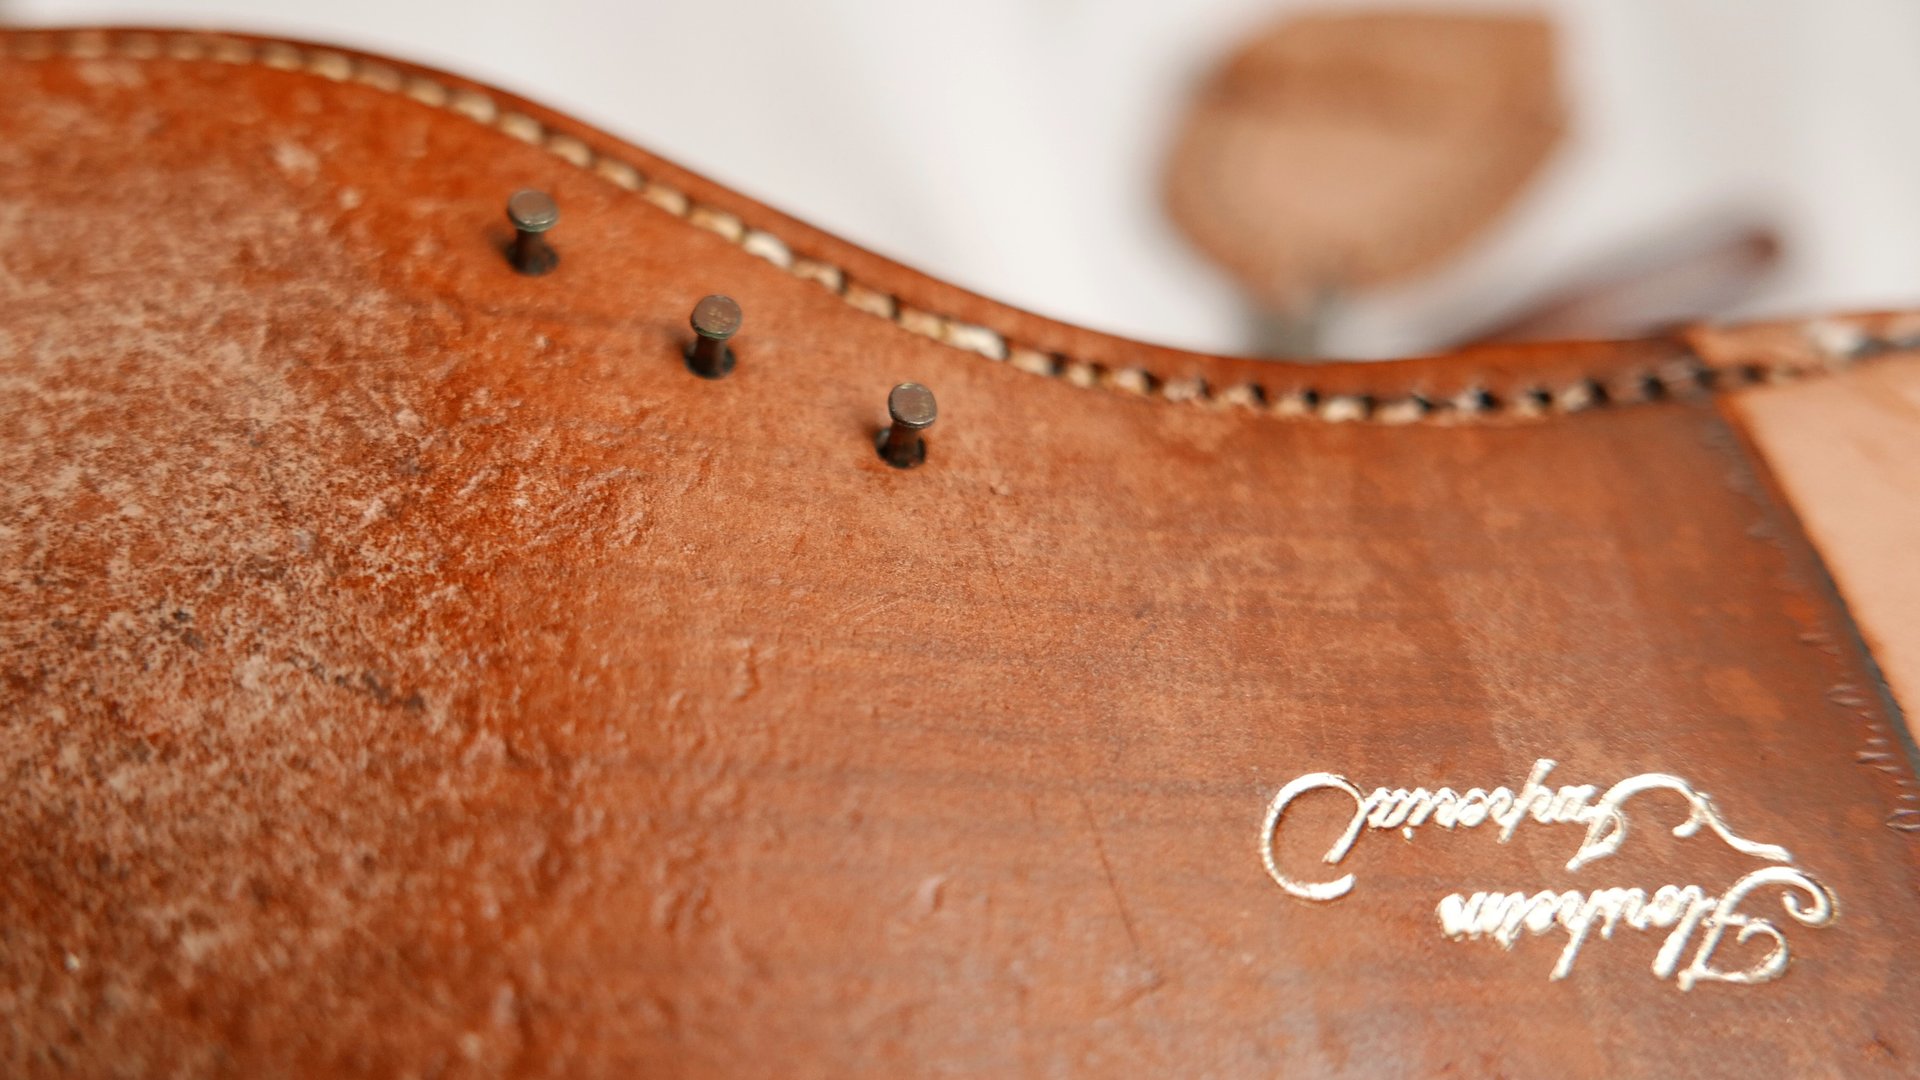
After first pulling out the insole heel pad, I then removed the entire heel. This was easy to do. You can pry the entire heel off by inserting a blade between the heel and outsole and applying some pressure. The heel was attached with 11 square nails. No adhesive was used to attach the heel.
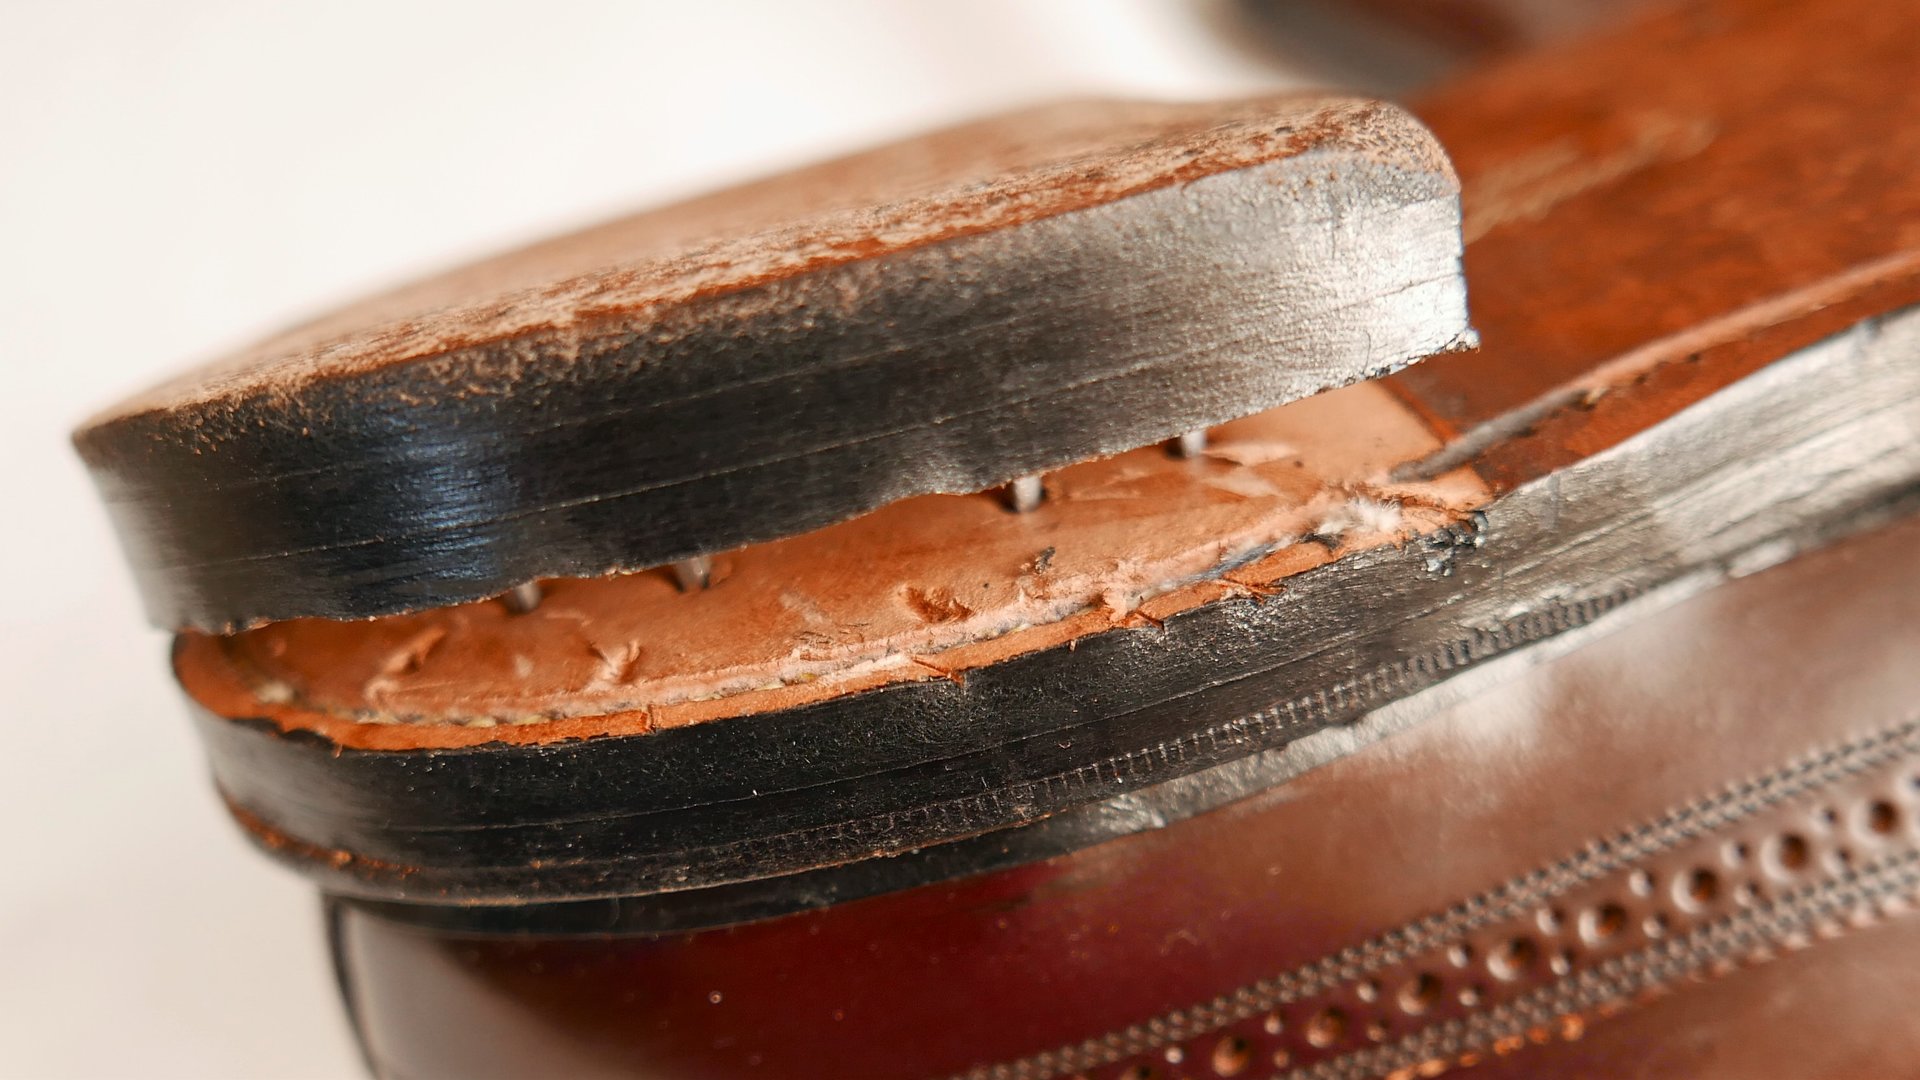

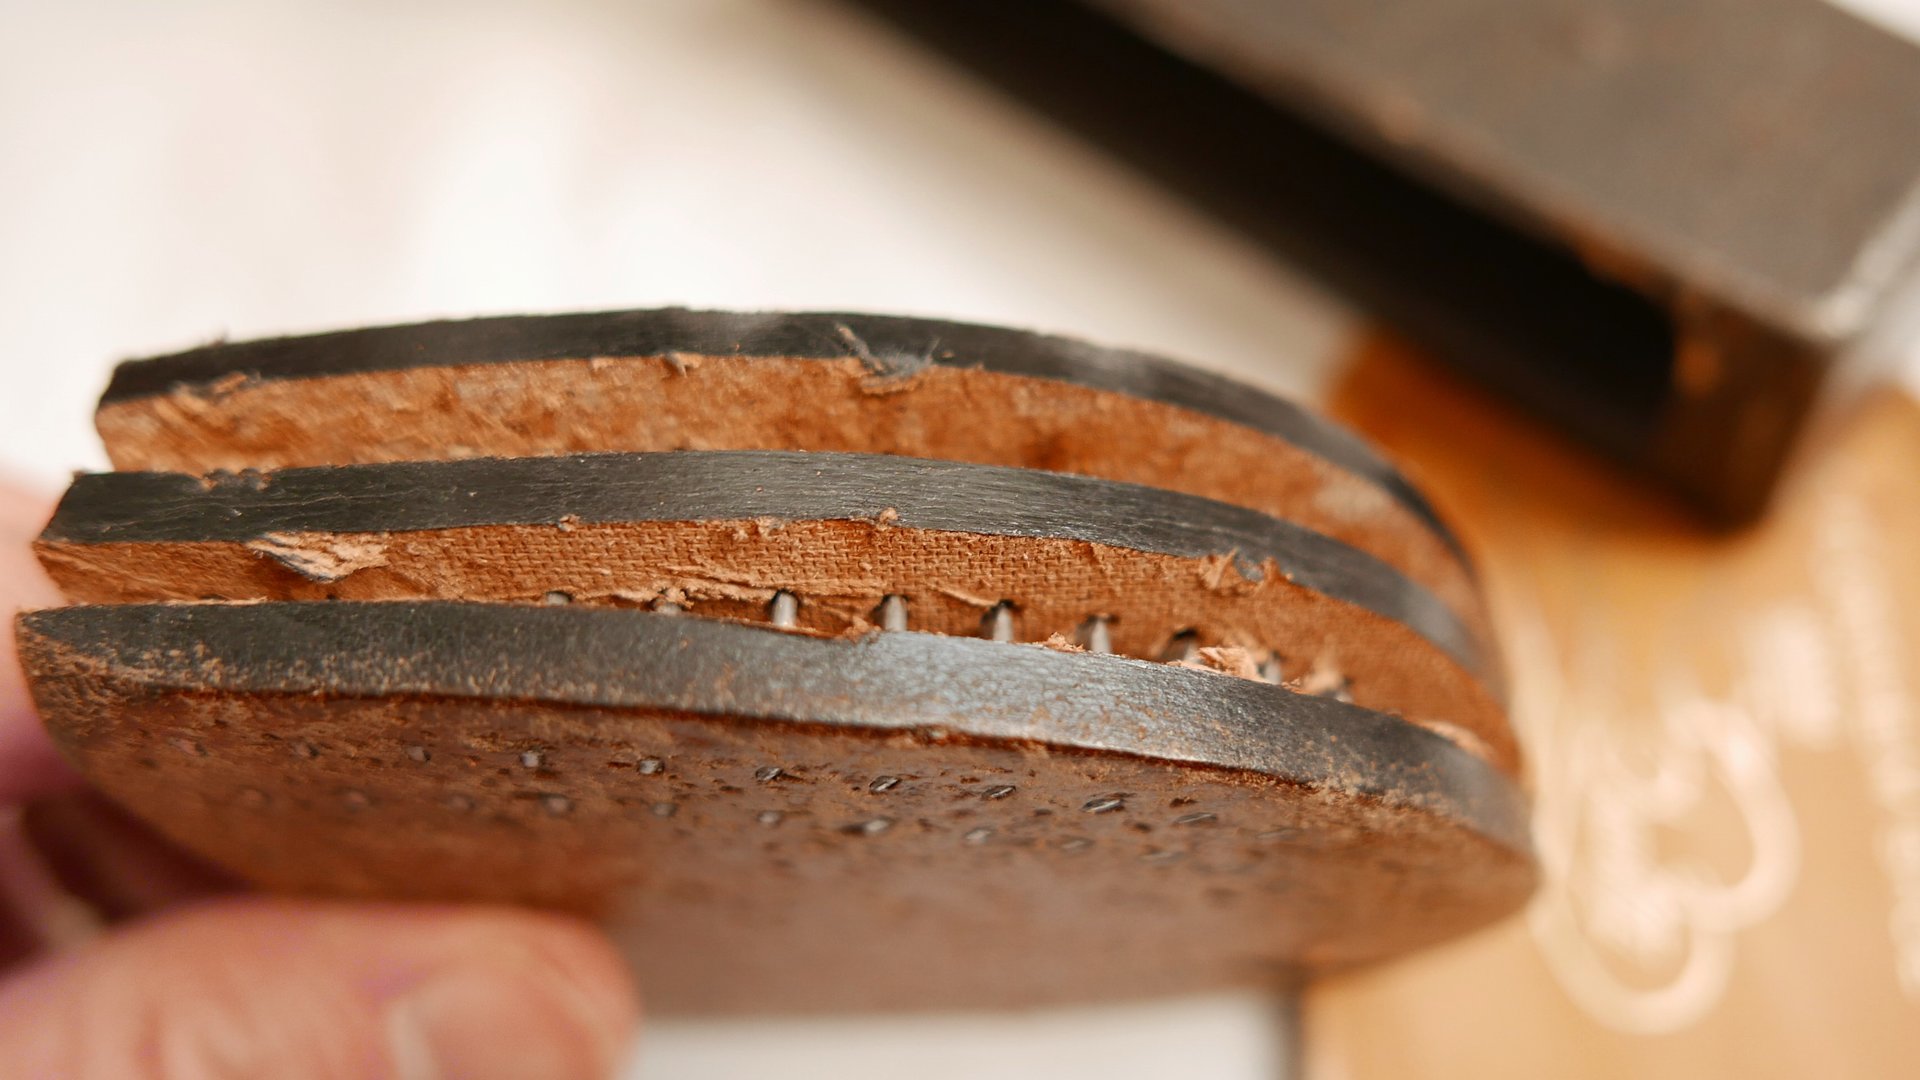
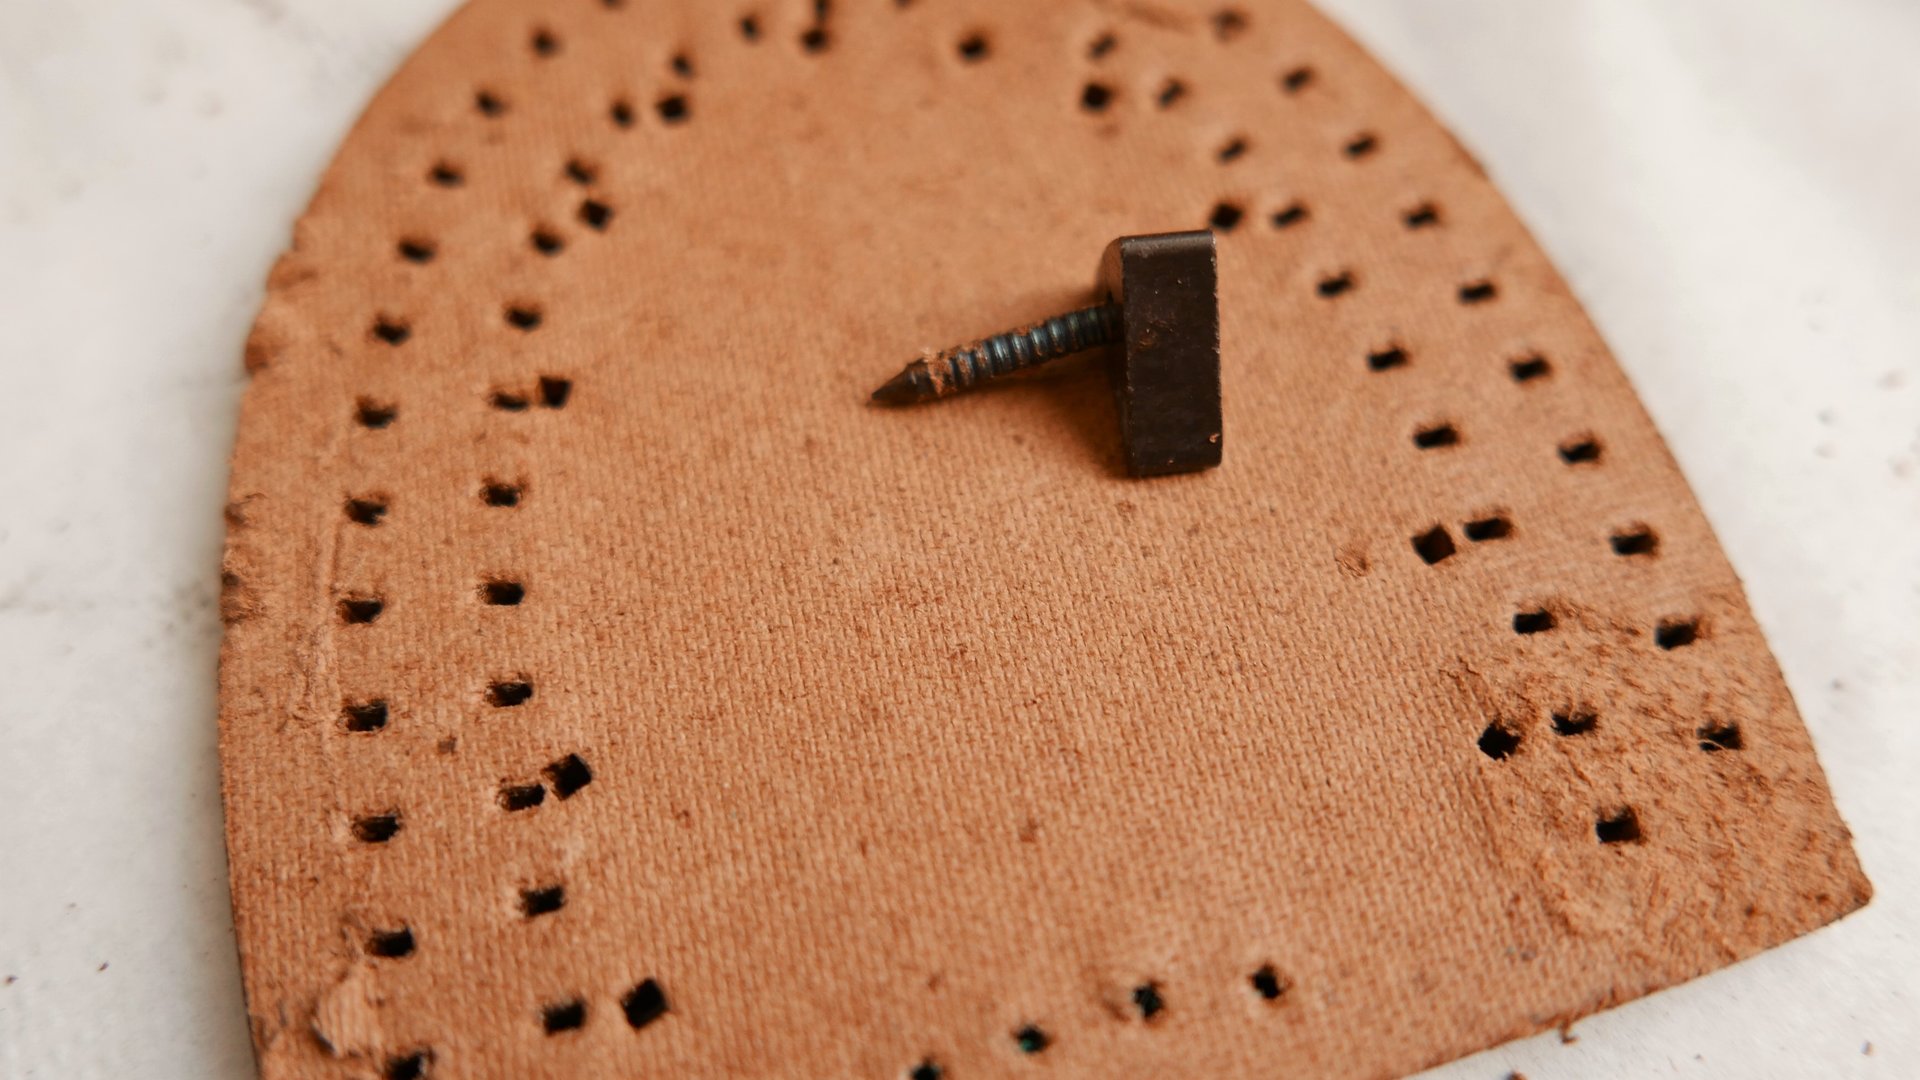
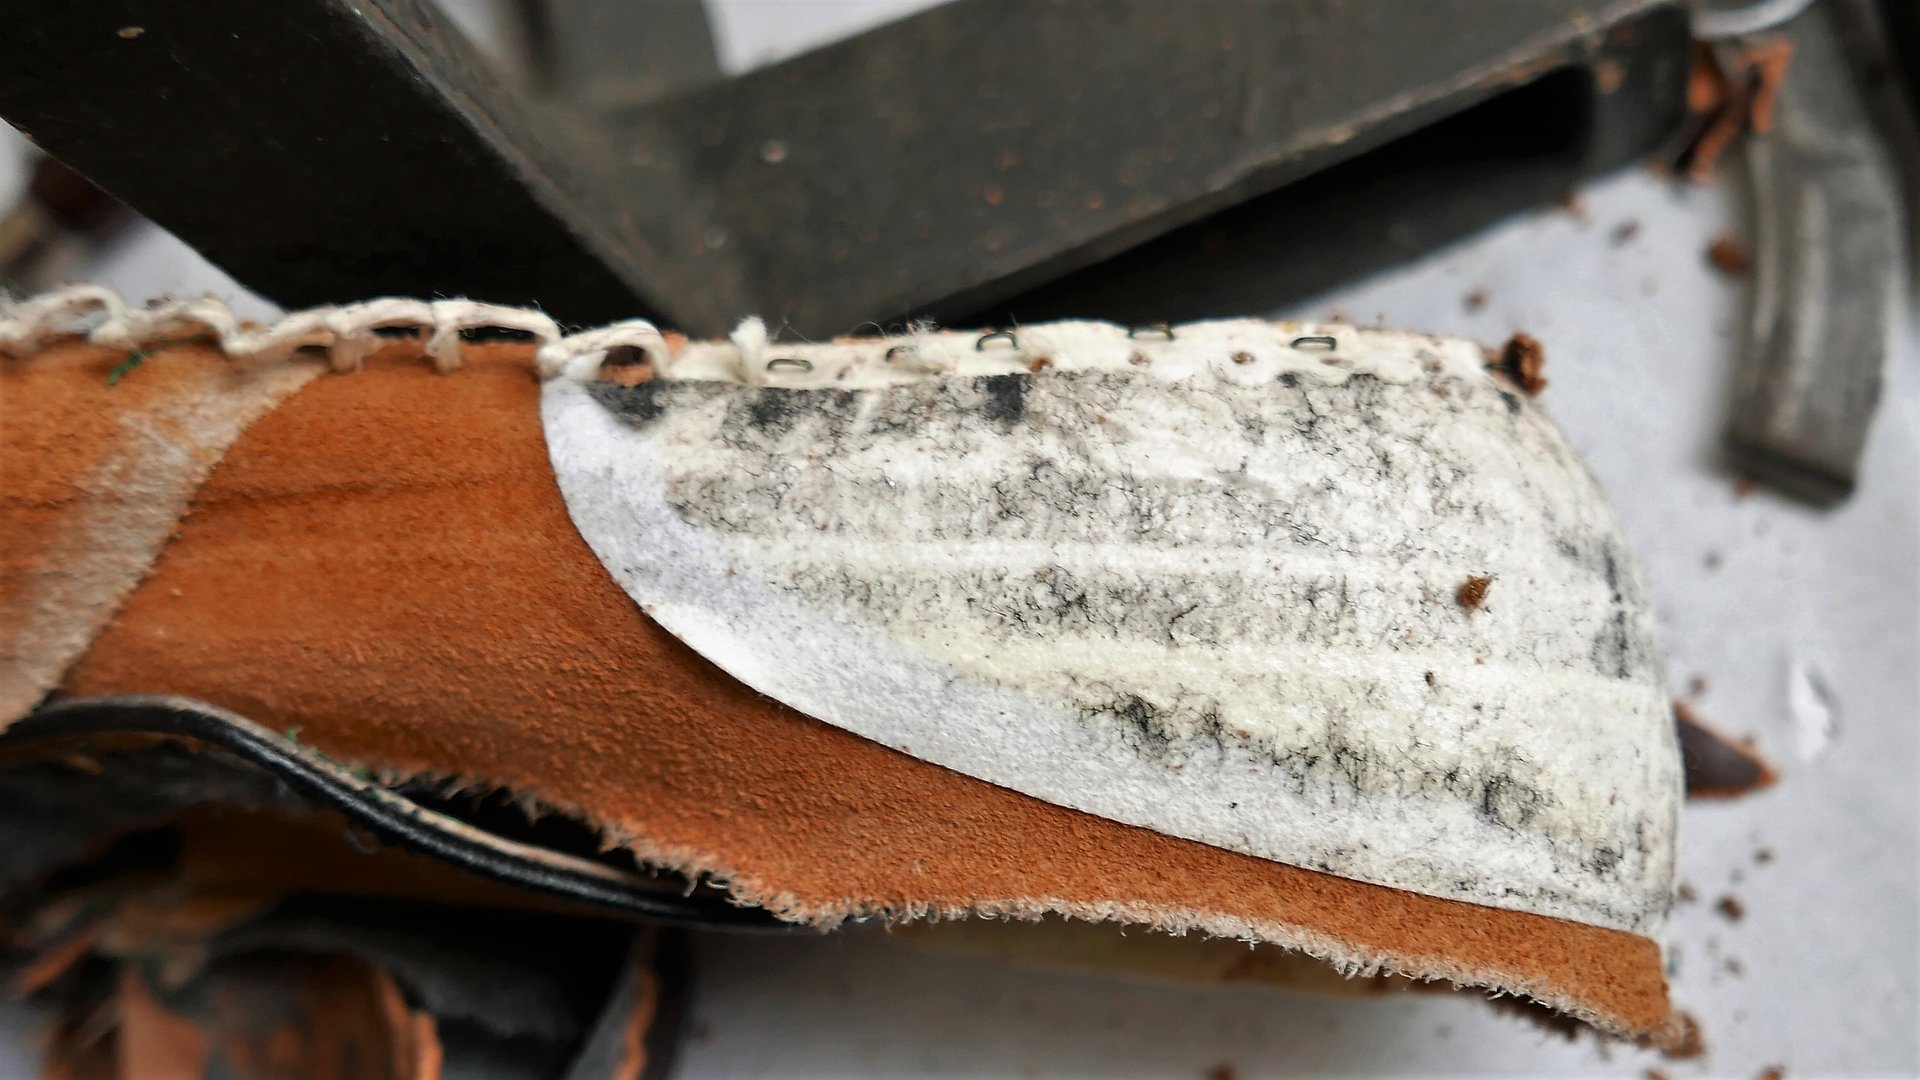
The heel itself was composed of three stacked pieces. The first layer (the toplift), was leather with about 60 nails and a v-cleat insert. The second and third layer was made from fiberboard, not leather. I assume this was done to reduce costs. The v-cleat is attached with a threaded nail.
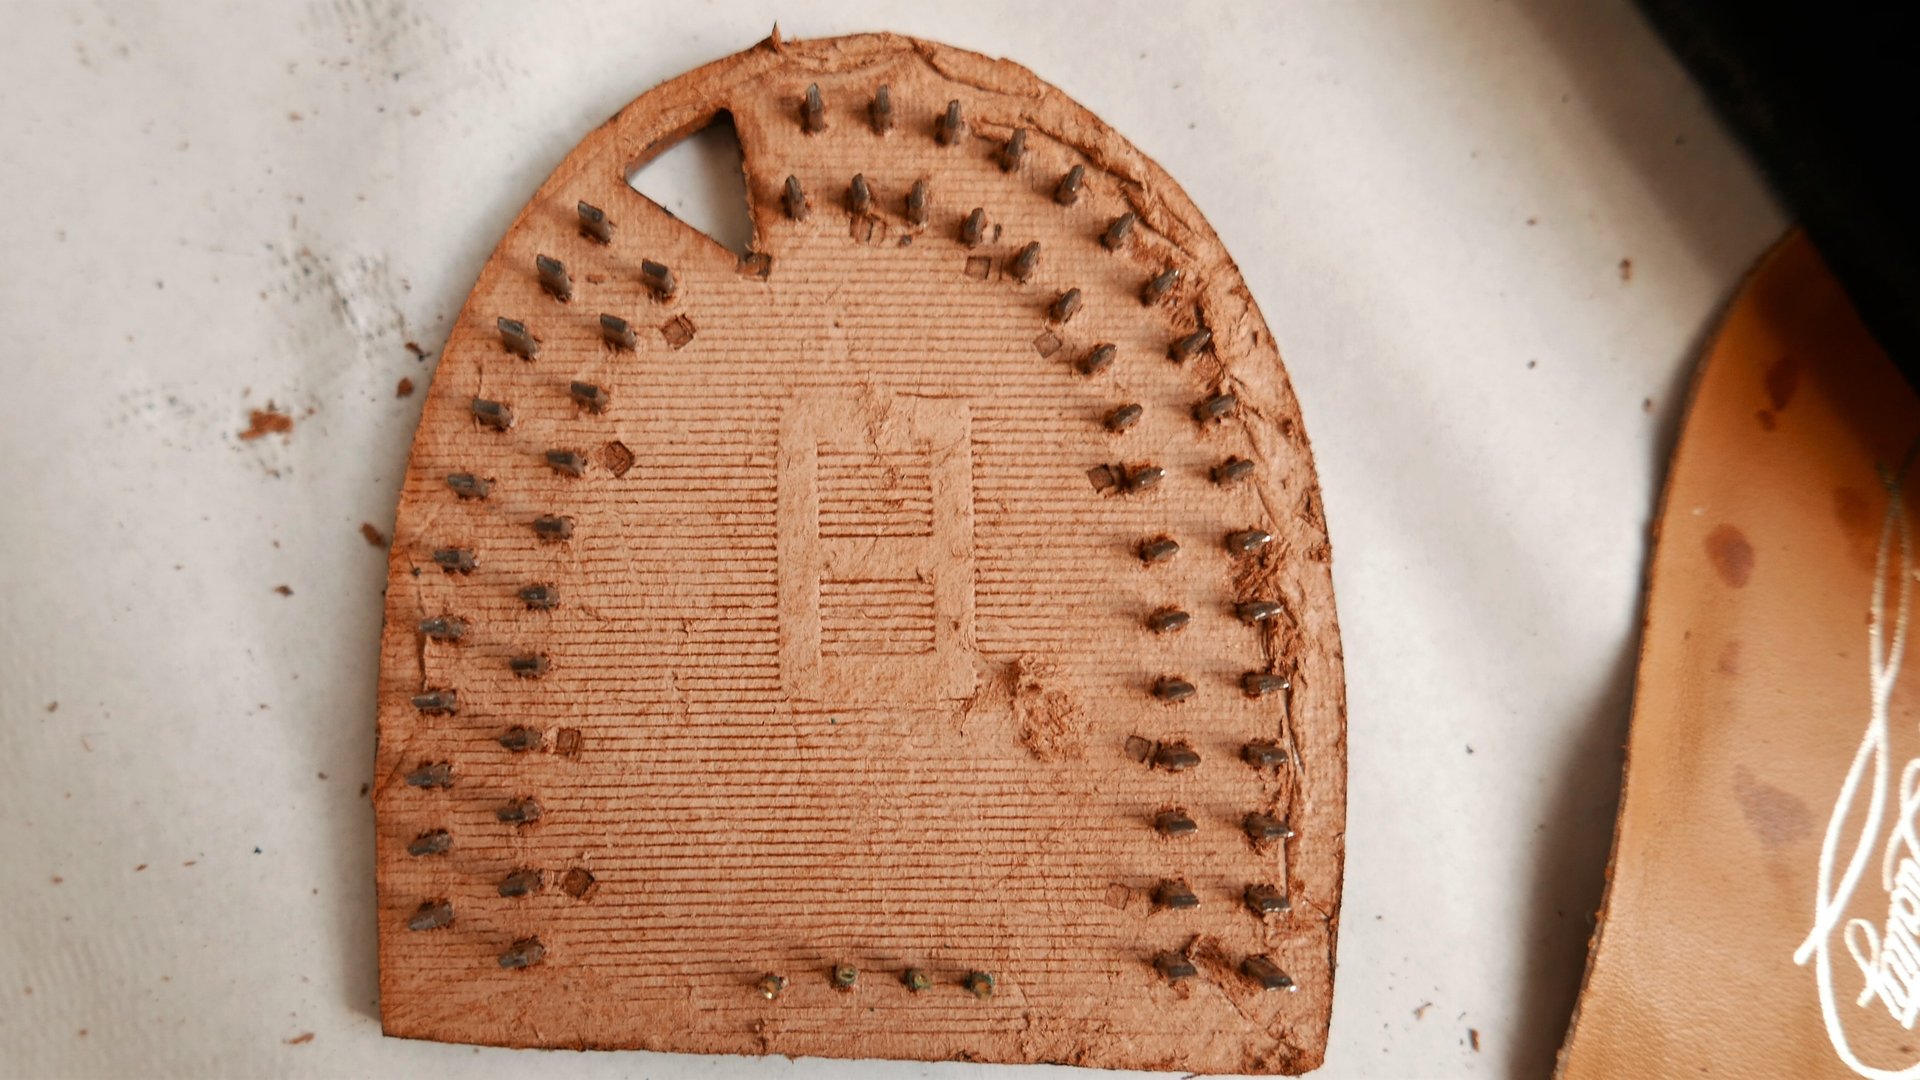
The heel was likely premade and then attached to each shoe at the time of construction. I have seen various versions of the Florsheim heel. Some are stamped with the manufacturer. Many use vinyl/plastic instead of fiberboard for the middle layer. A few of my 1960s Imperials appear to have a full leather heel but I am not 100% sure on that fact. So it may not be a fact. But it is a fact that the $1000 Balenciaga Triple S was the hotest shoe of 2018. Go figure.
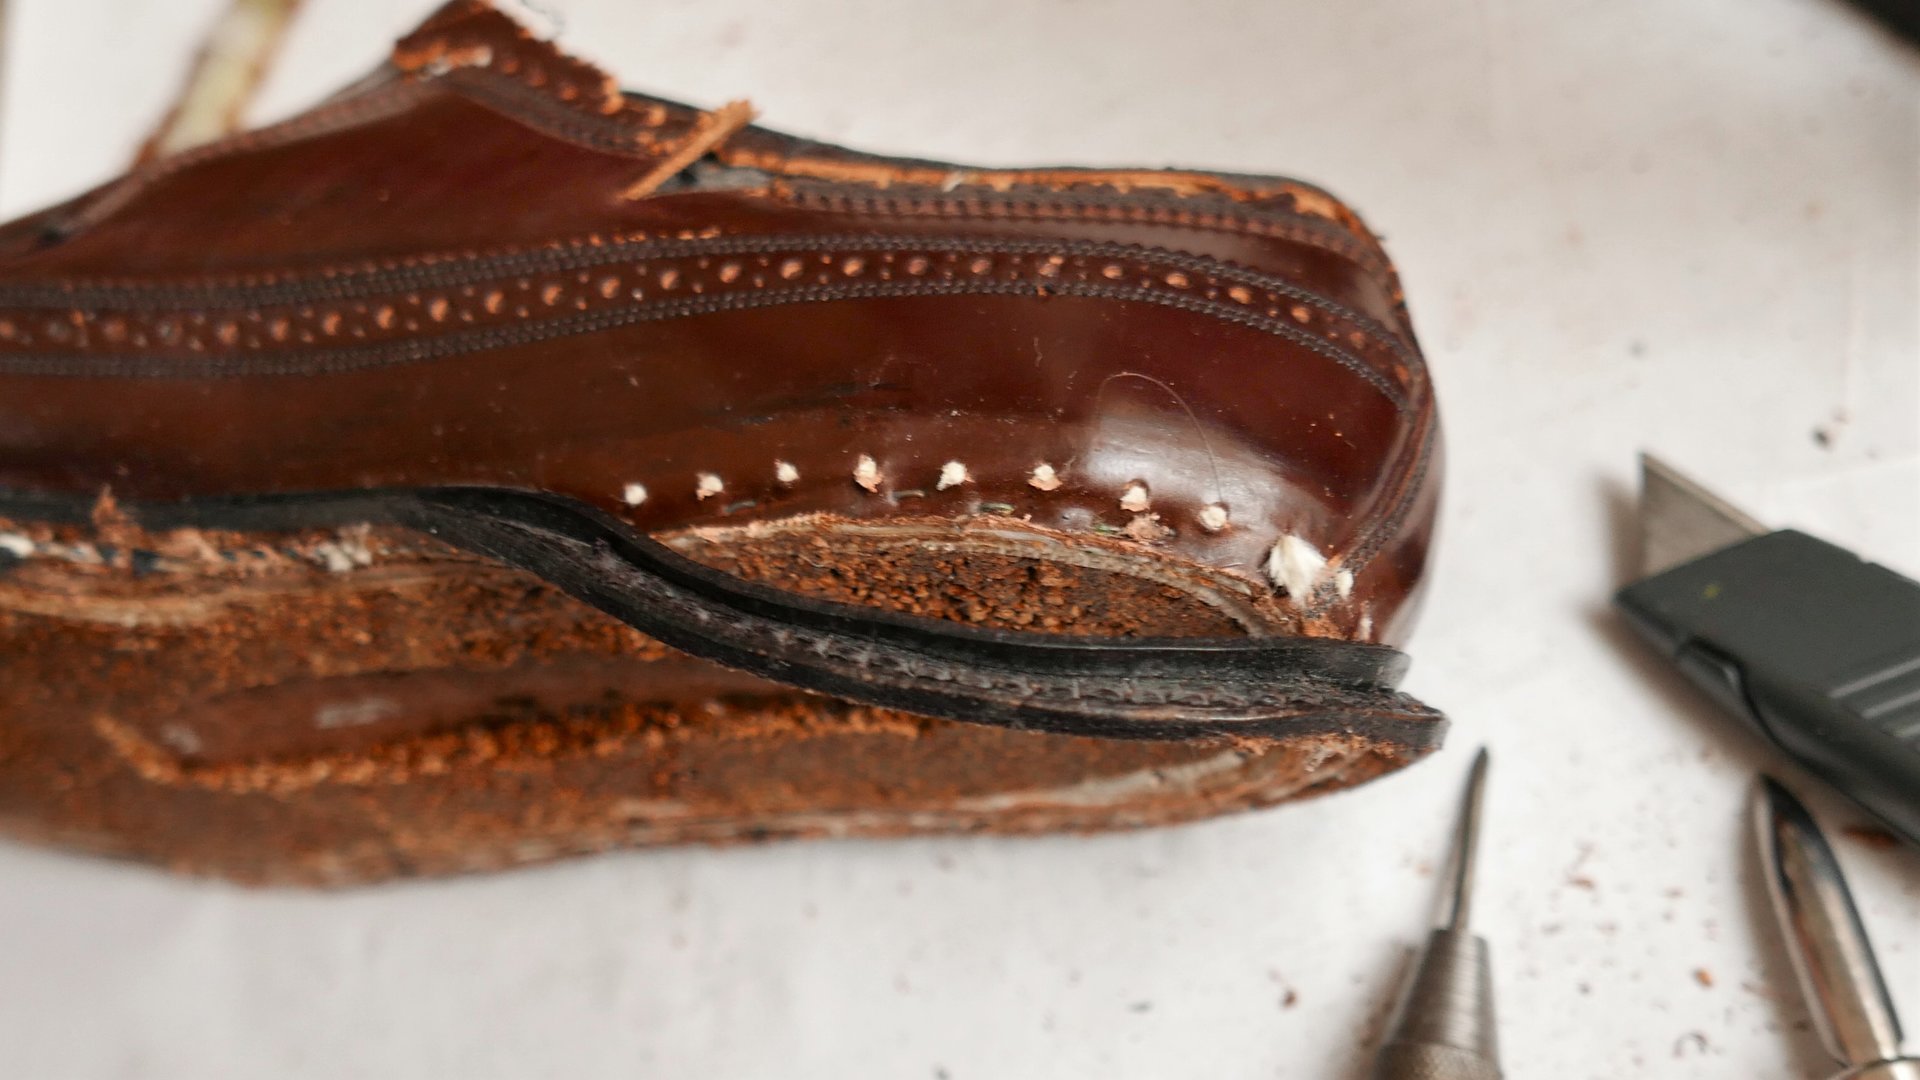
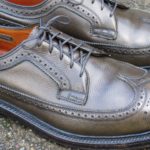
The pair is Goodyear welted. I was able to detach the sole by running my knife between the welt and the outsole to cut the welt stitching. It wasn’t difficult and no glue was used adhere the outsole to the shoe.
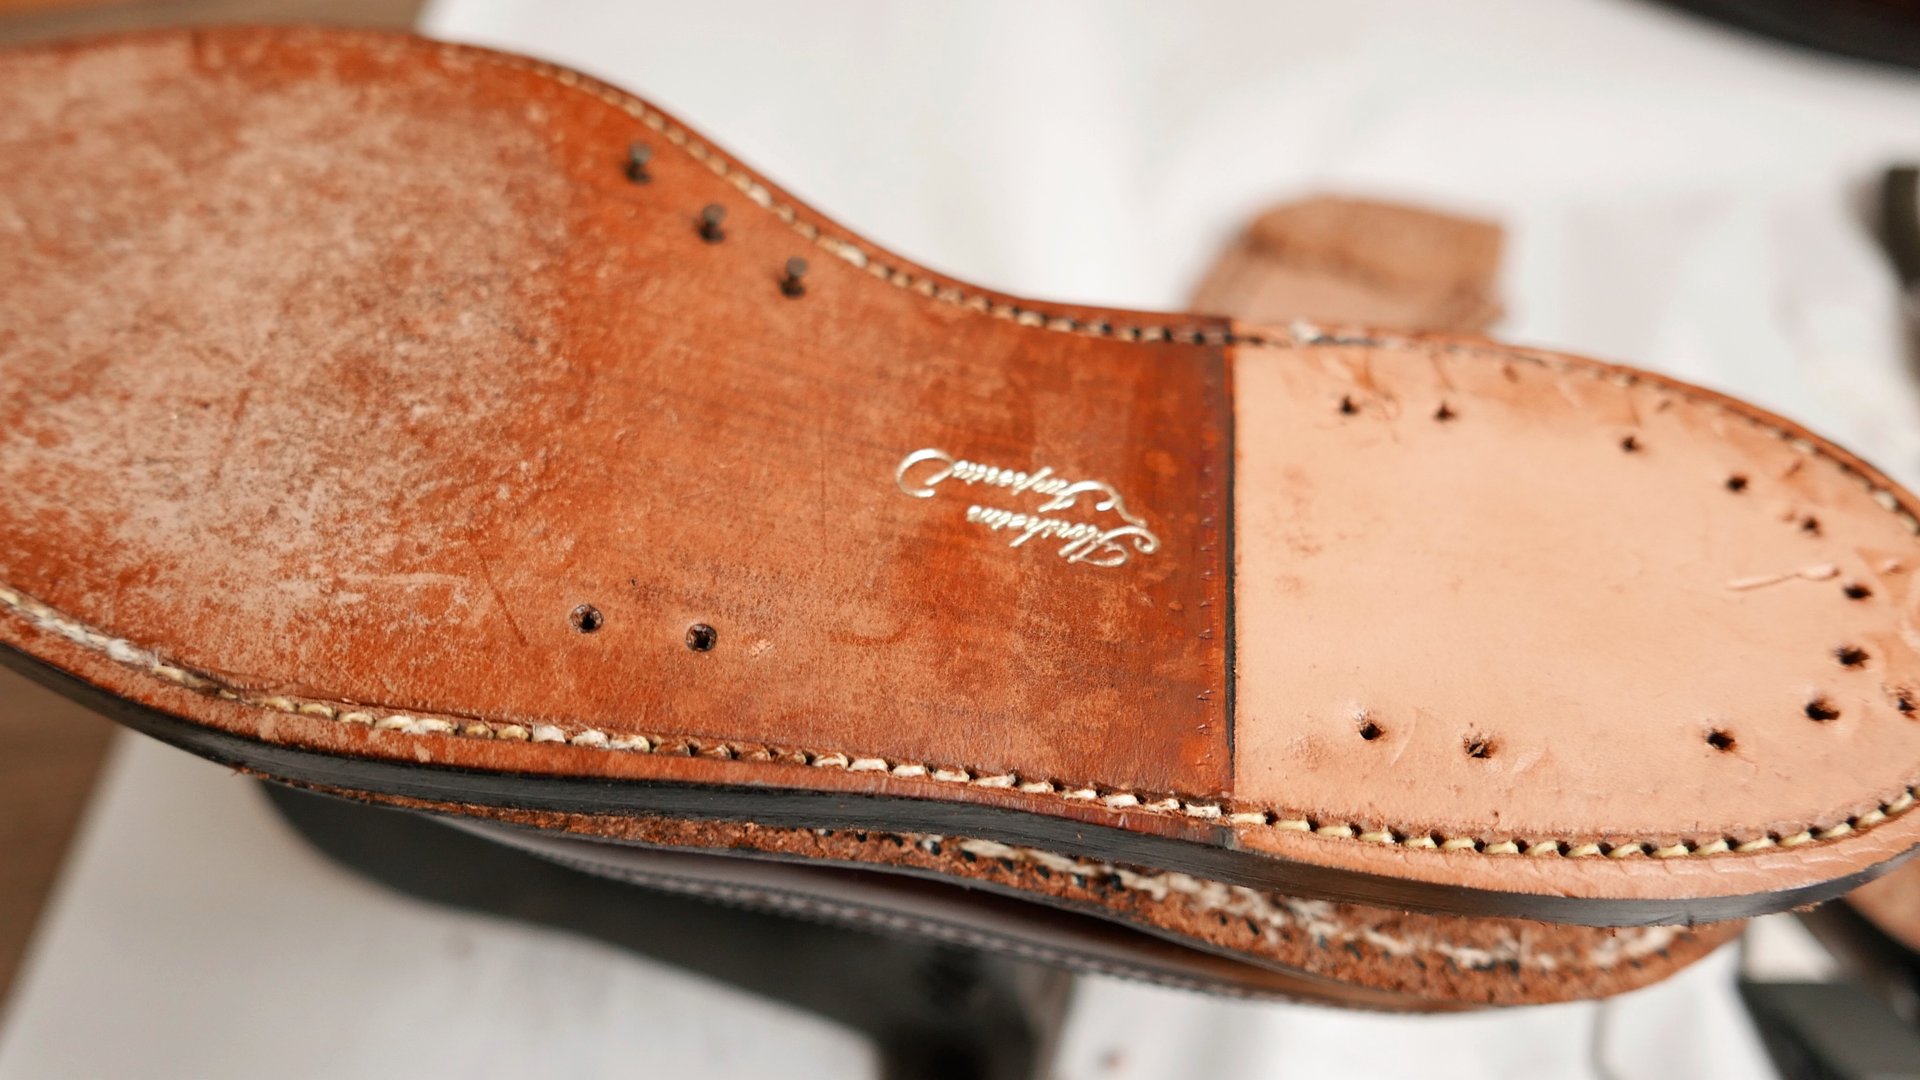
The double leather sole was heavy. About a half pound on my scale. It was also surprisingly flexible given that the leather was a half inch thick. I am no leather expert, but I found the sole leather to be higher quality than the heel leather. I am probably a bit late though to alert Florsheim quality assurance about this issue.

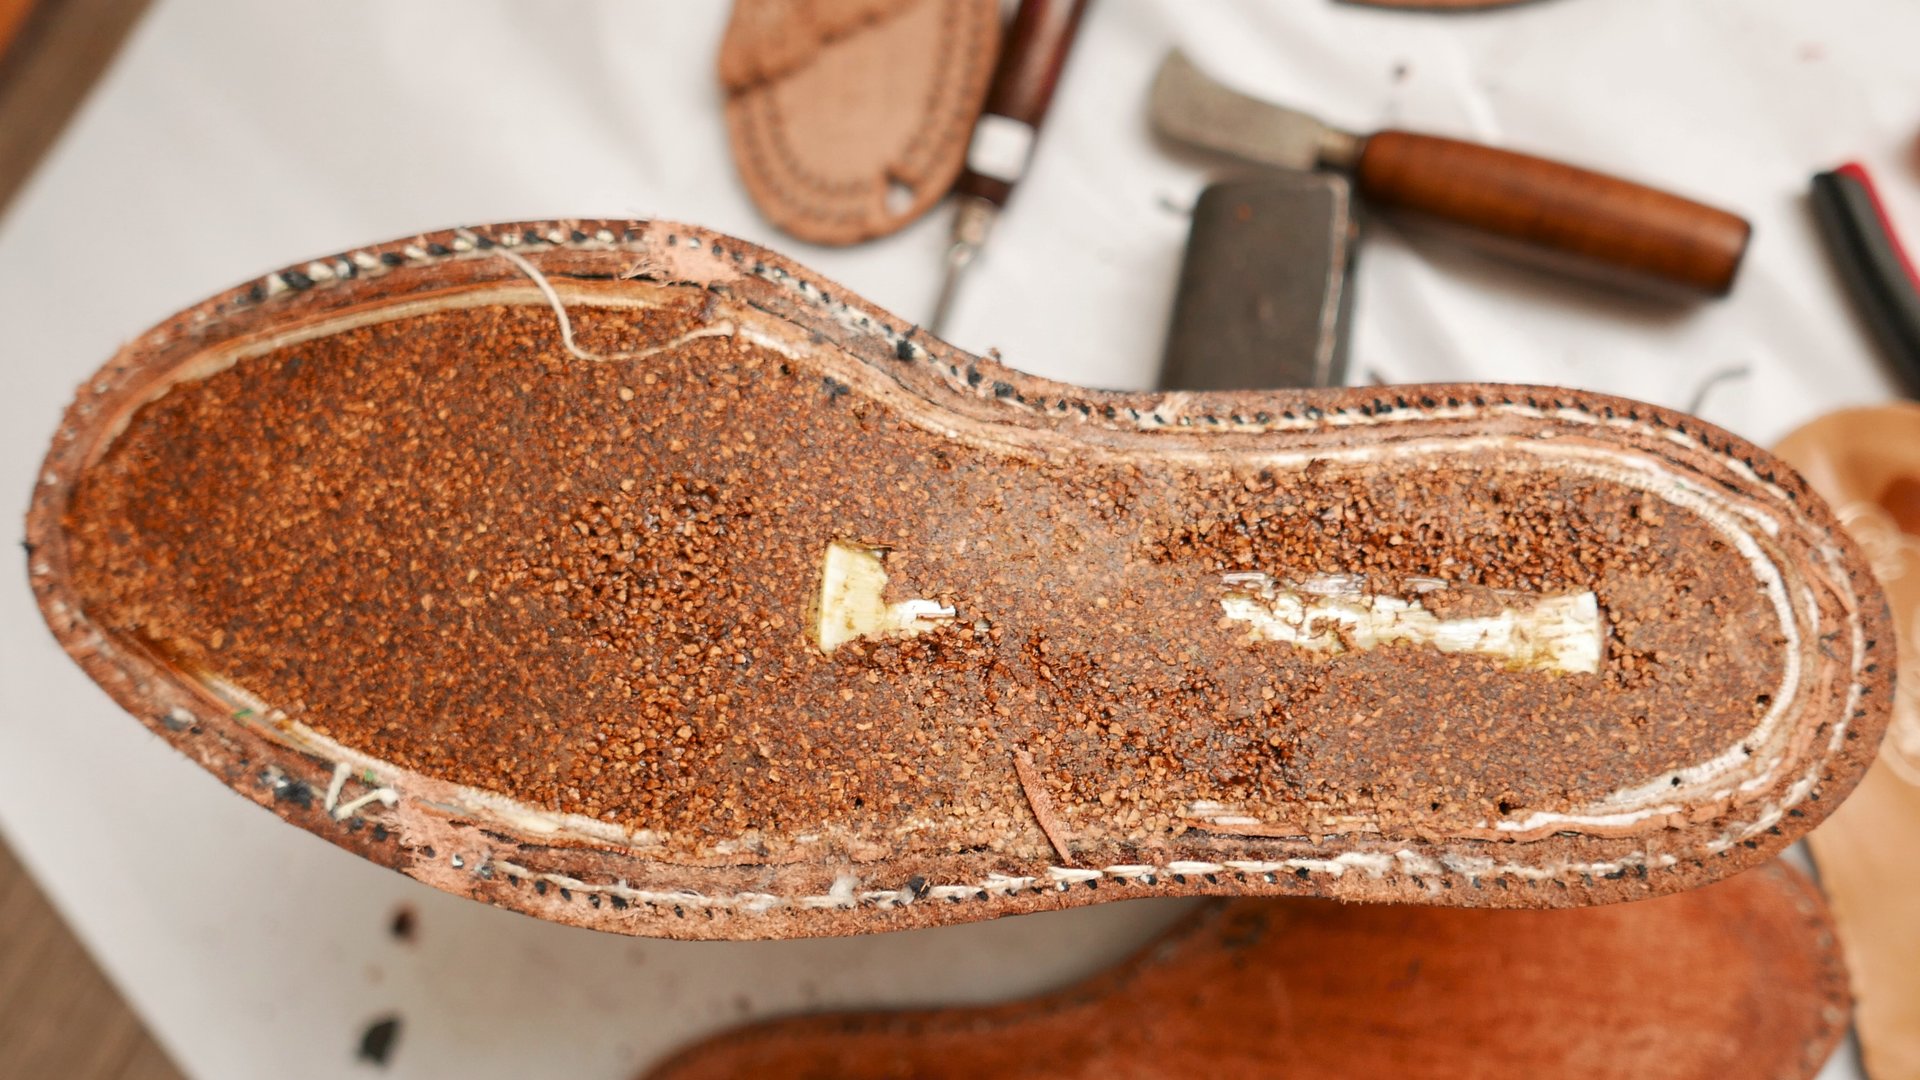
Beneath the sole was a layer of cork with an embedded fiberglass shank that looked somewhat like a pork rib bone. The shank was easy to pull out and had a slight bend to it. It may have been attached with a small amount of glue but it seemed like it was simply inset when the hot cork fill was applied under the insole.
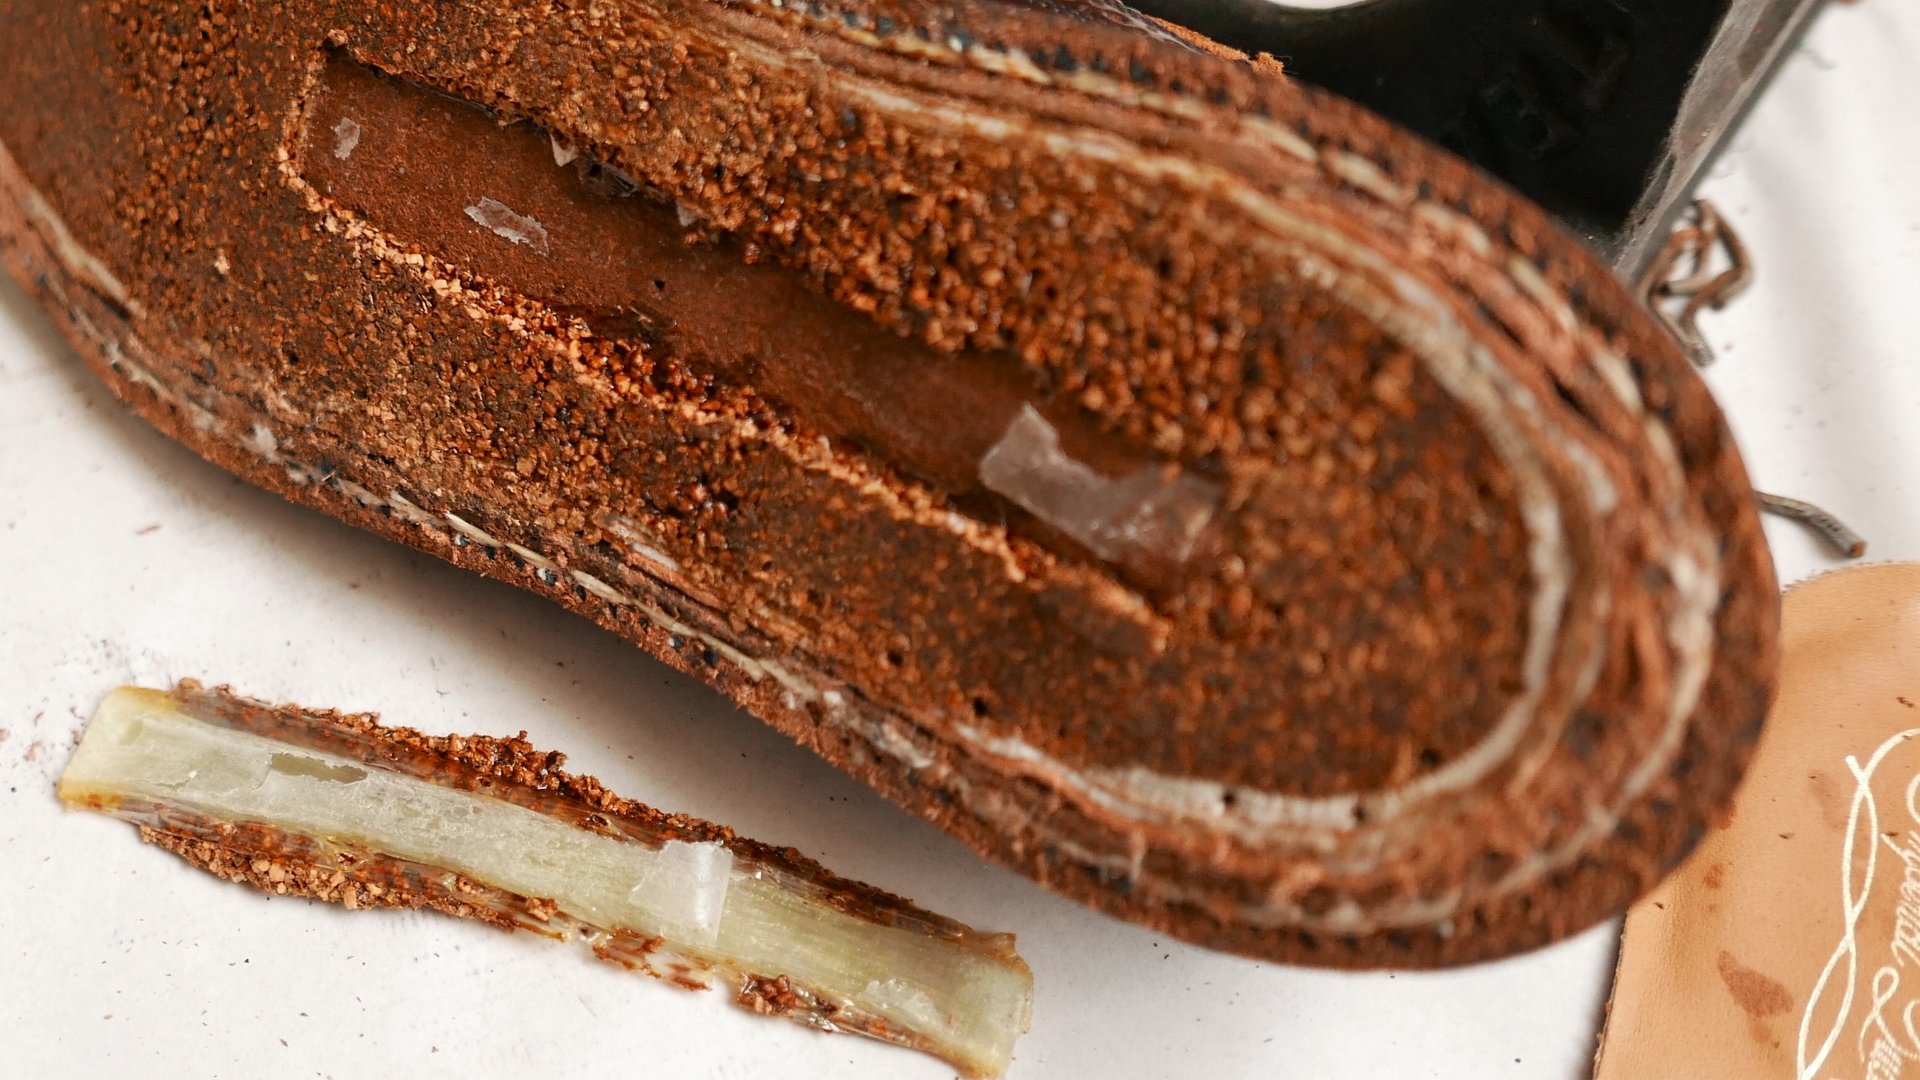
The leather storm welt was attached to the shoe with thick, white cotton stitching. The stitching went through the base of the Shell Cordovan upper. The upper itself was attached with copper staples. I cut through a section of the welt stitching and was able to simply pull the leather welt off the rest of the shoe with a small amount of force. As sure as Kilimanjaro rises like Olympus above the Serengeti.
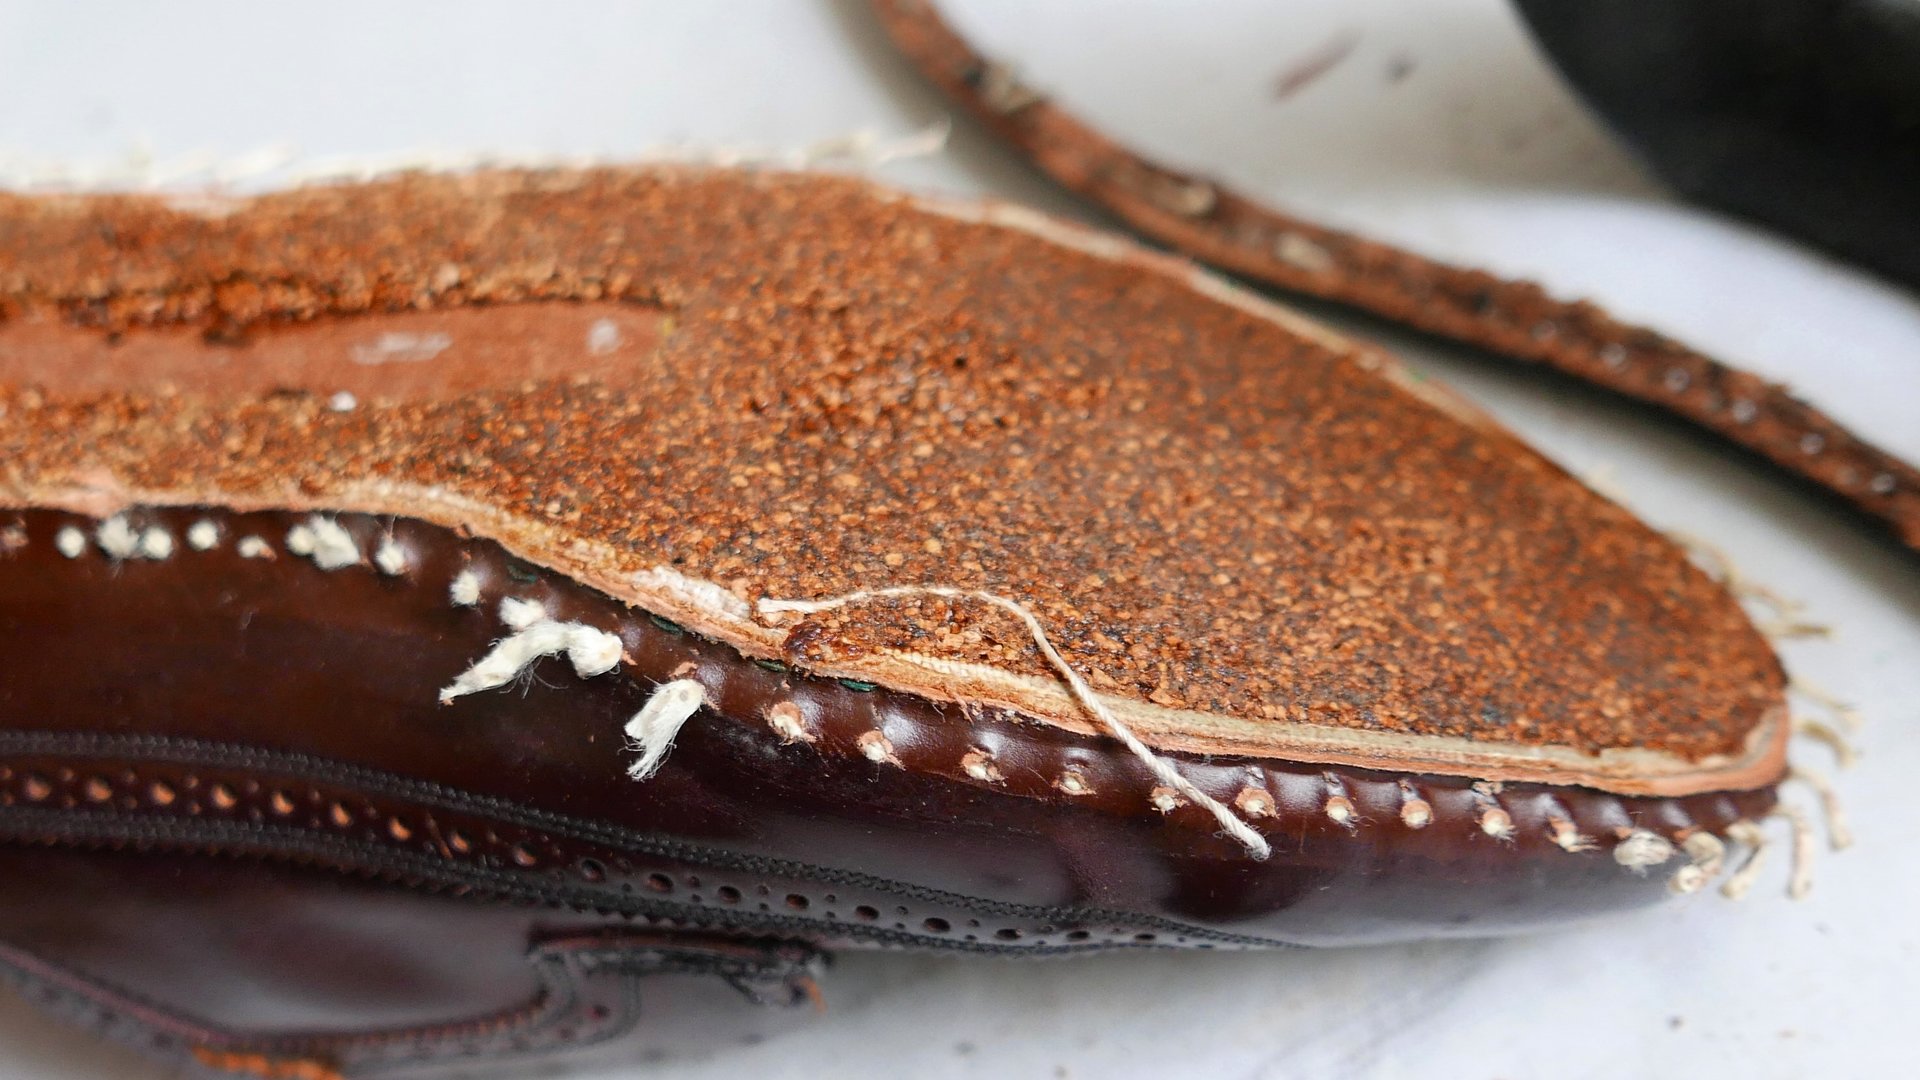
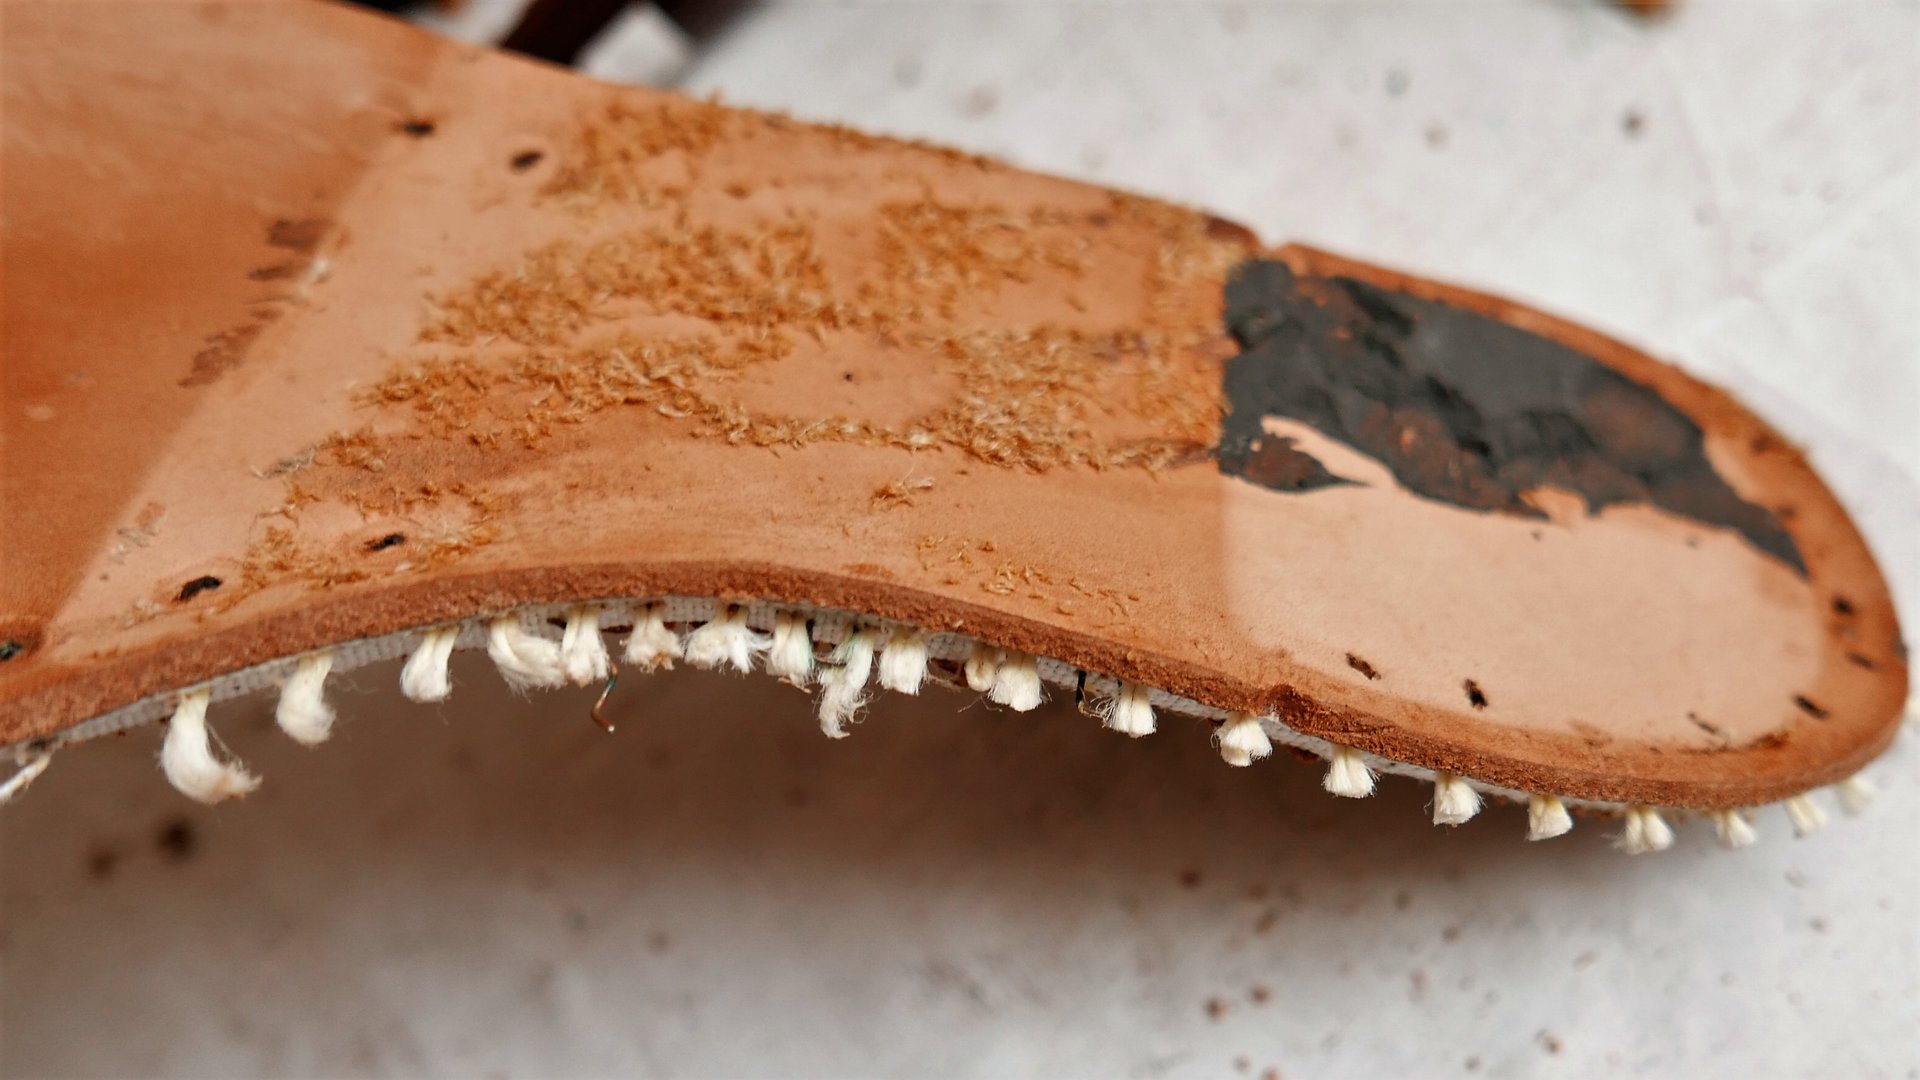
The upper, the welt, and the insole are all attached to a ribbon of canvas that was glued beneath the insole. This is called gemming and it is essentially the backbone of the shoe. Most Goodyear welted shoes use gemming. It’s not just a Florsheim thing. You can see it in the photo below.
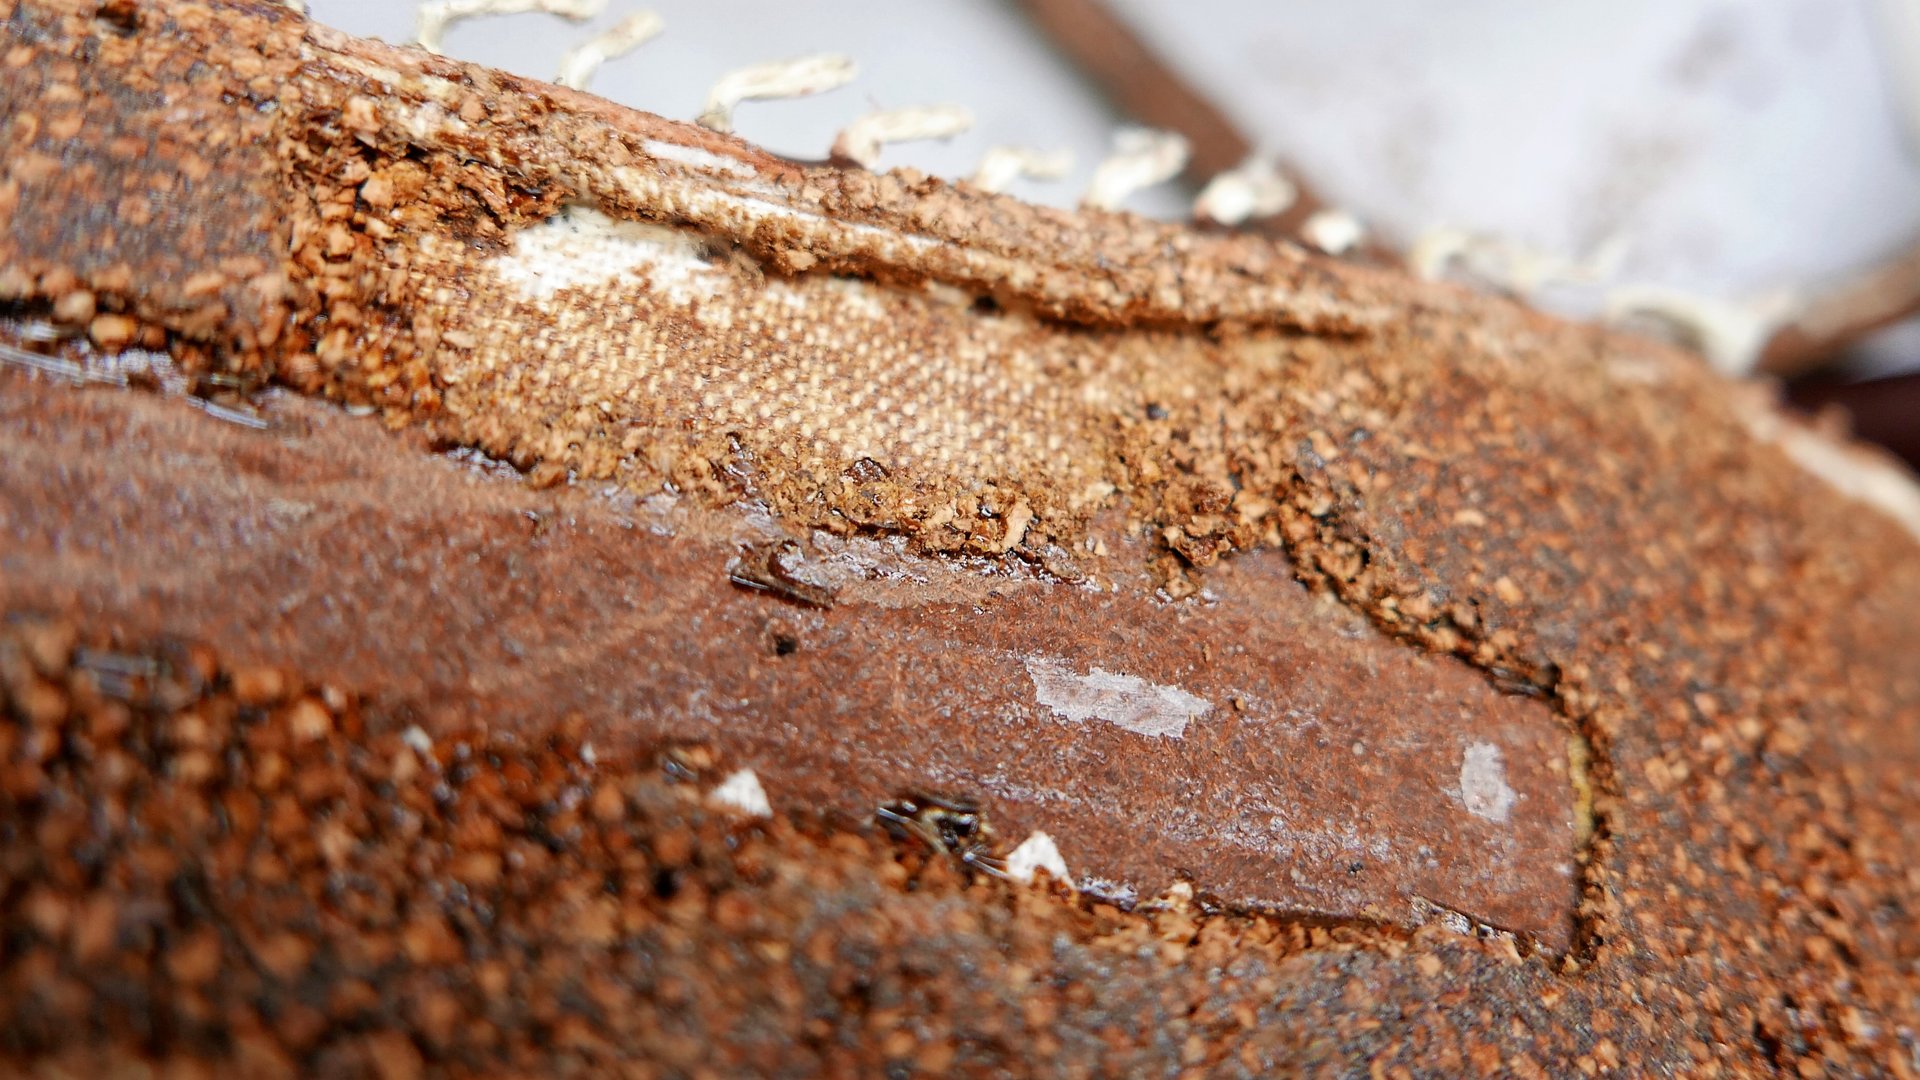
Years ago, there has was considerable online debate about gemming and if it is the fatal flaw of modern Goodyear welted construction. If the gemming fails, the insole separates from the rest of the shoe and requires the shoe to be relasted to fix it. On the anti-gemming side is well known shoemaker DW Frommer. He has posted frequently on the topic and his feelings are best summarized by this statement: “my lifelong abhorrence of, and subsequent crusade against, gemming”. The ShoeSnob later weighed in and basically said that gemming failure is unlikely since people don’t typically have their shoes resoled more than two times.
Should you worry about your Goodyear welted shoes falling apart? Should I? Is this a real issue? I was a bit skeptical (as usual). I have never experienced my insole separating and the gemming on this Florsheim pair was well secured. To answer these questions, I asked a cobbler friend, Steve Doudaklian of Bedo’s Leatherworks, about gemming failure. Steve said he encountered it fairly often and that it occurred in one in five Allen Edmonds pairs. Sure enough, if you watch one of Steve’s videos on an Allen Edmonds repair, it appears the gemming has separated from the insole. Ouch. So, it is a real issue. But don’t lose sleep over it unless you plan to resole your Goodyear welted pairs often.
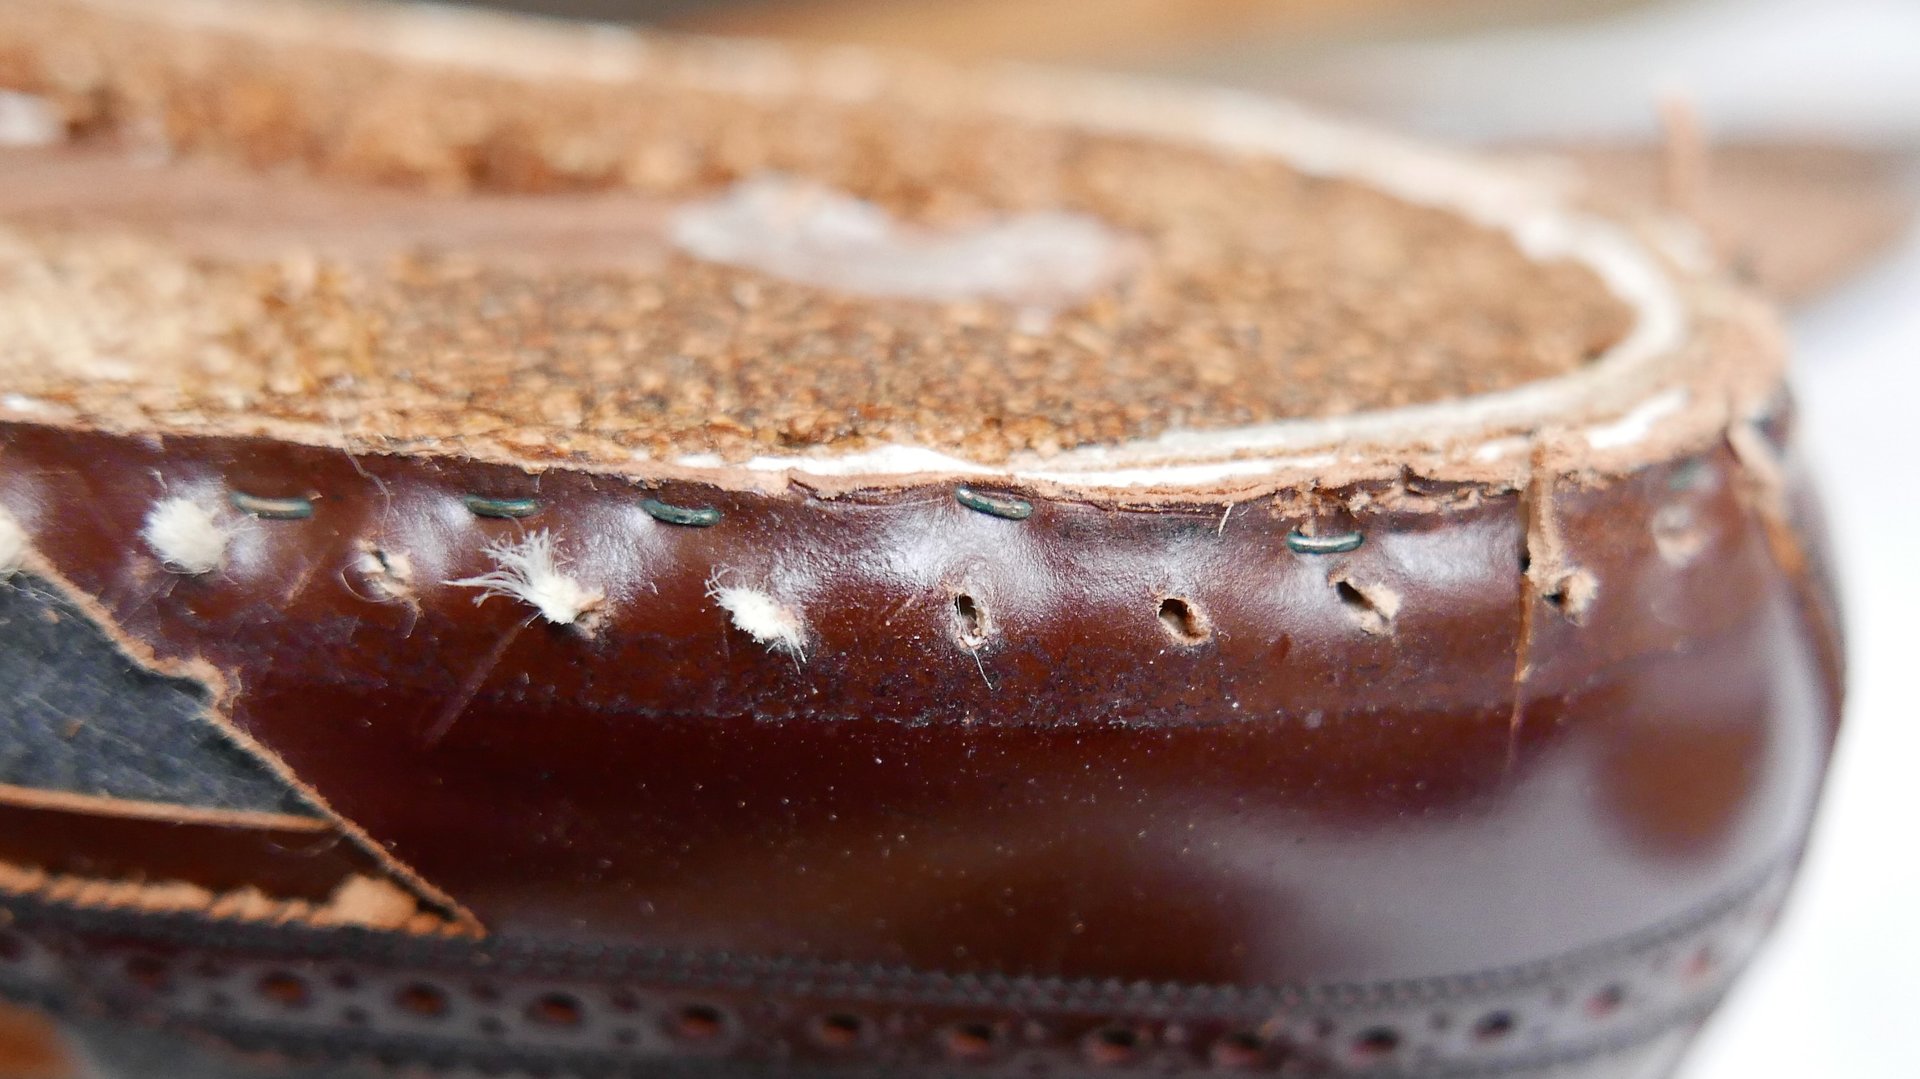
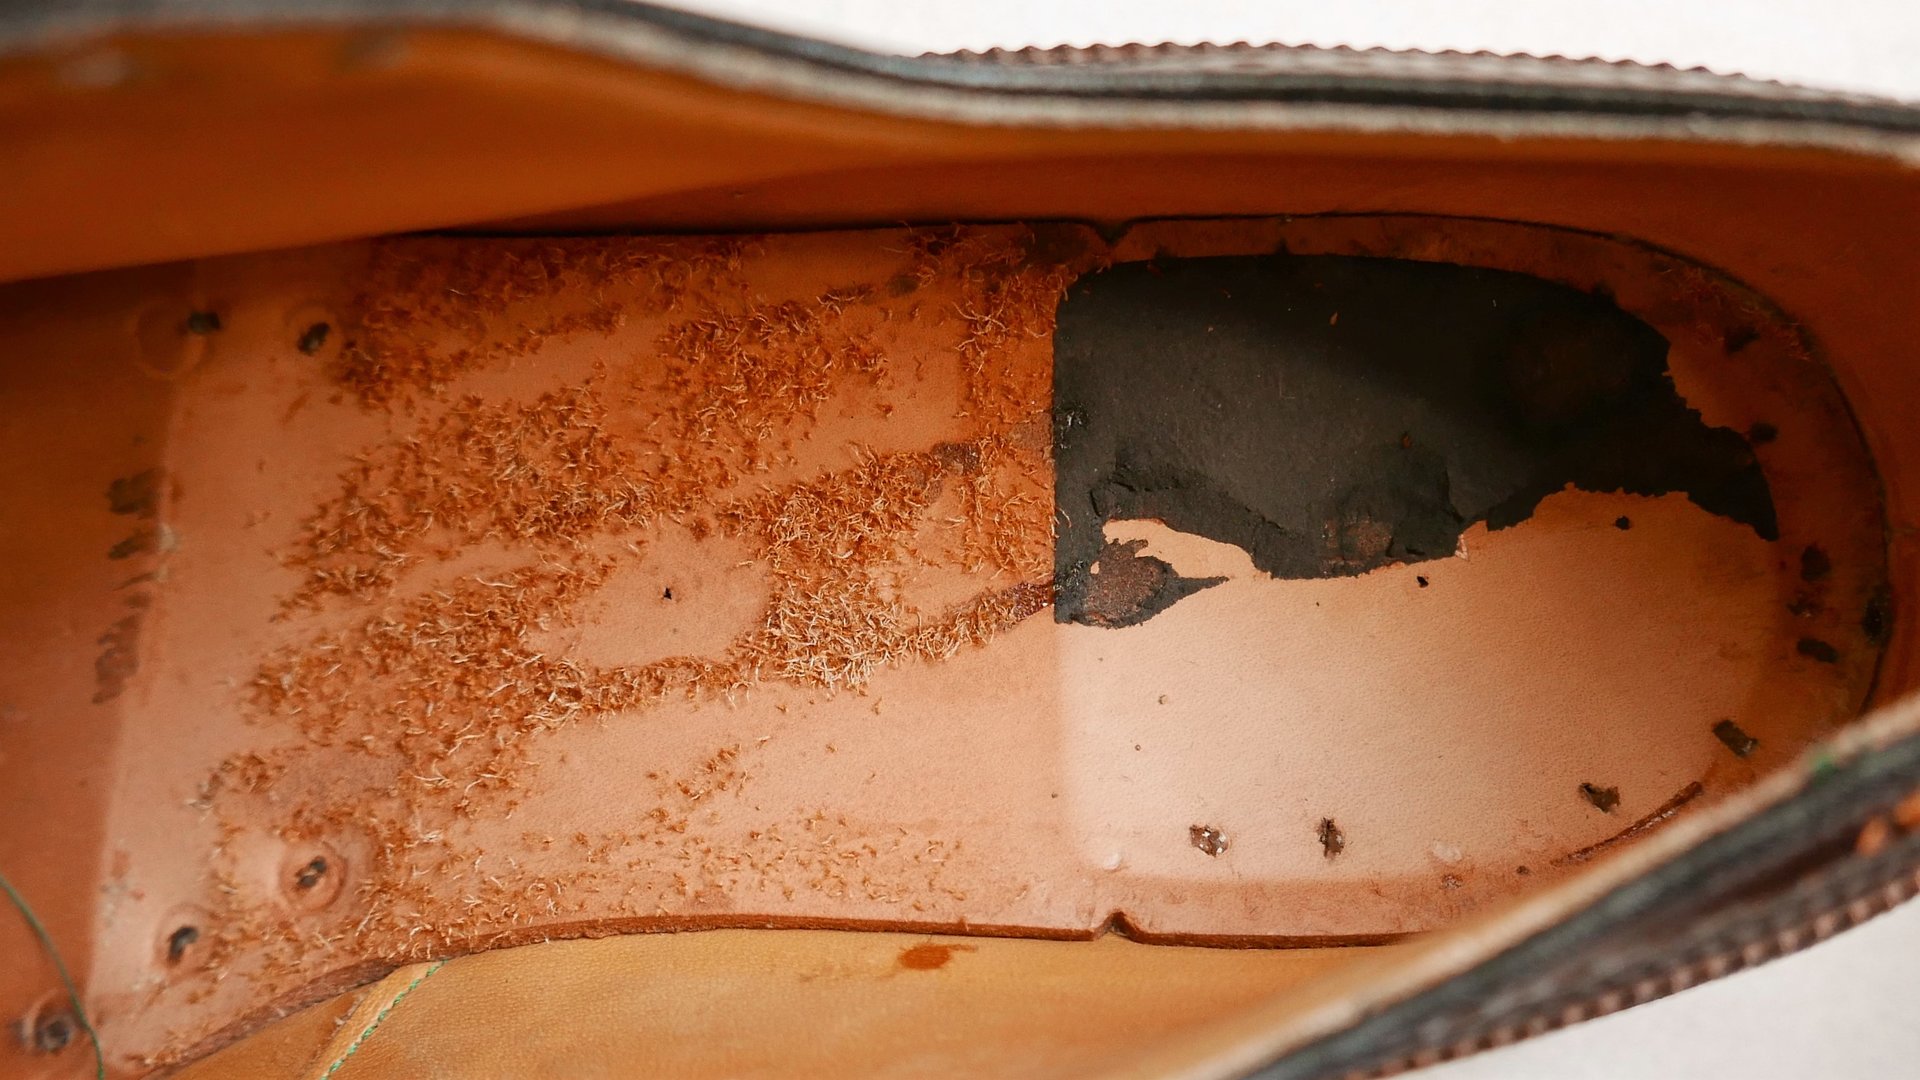
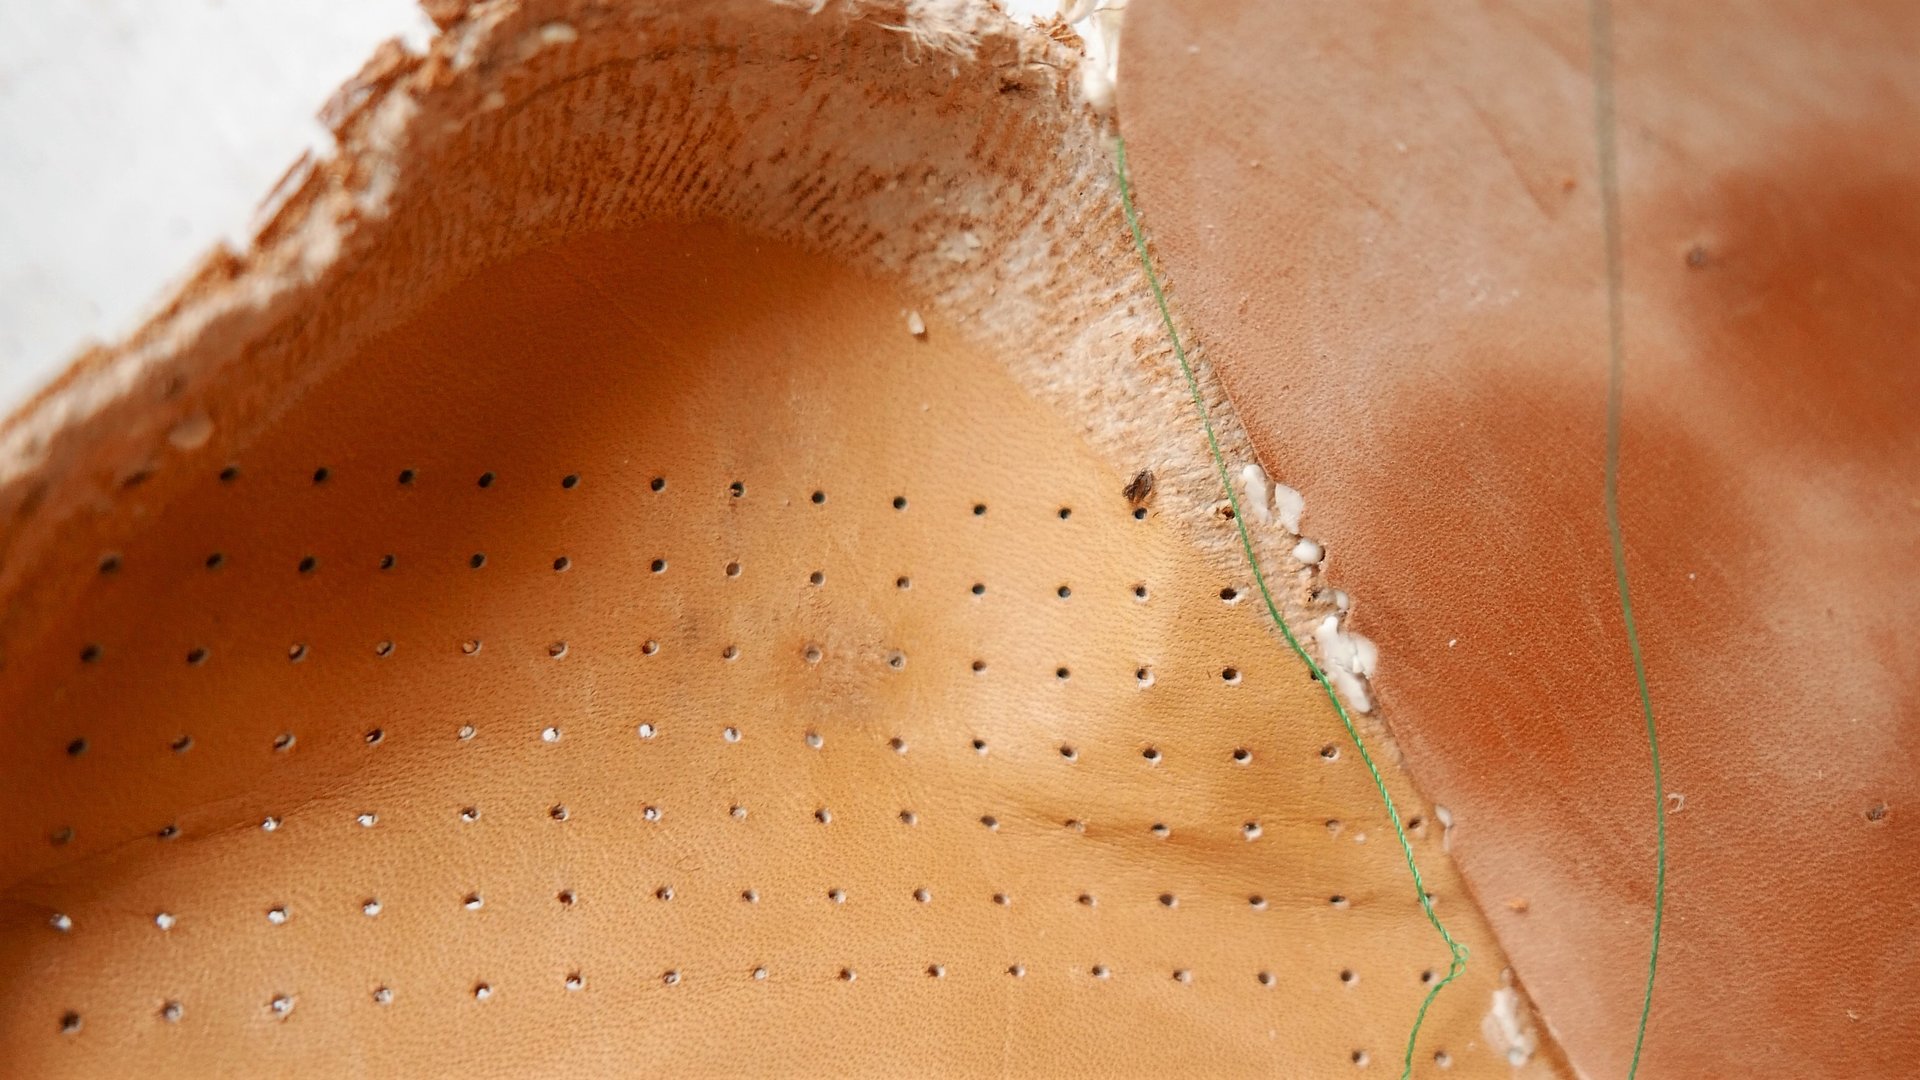
The insole of the 93605 was a thick and heavy piece of leather. The famous Florsheim five nails fully penetrated the insole but the nail tips were mostly covered by a leather heel pad.
After the sole and welt were removed, I started executing my plan of taking apart the right shoe upper stitch by stitch. I abandoned this plan right around the three-minute mark. Which I had the right to do. I found that the two rows of tight stitching right next to the edge of the broguing was too difficult to undo. Maybe I didn’t have the right tools. Or I wasn’t doing it right. And I probably didn’t have the right patience. It’s my adult ADHD, right? I obviously need to right myself.

I was hoping to find a Horween stamp on the backside of the Color #4 Shell Cordovan upper but I did not. Sad. There were some manufacturing numbers. Maybe the stamp was on the left shoe. Or maybe not.

The glove leather lining was particularly impressive. The pair was fully leather lined and the lining was soft, supple and fairly thick. I believe the lining is kid leather. The lining was perforated with vent holes within the toe box area. There was also the toe, heel, and eyelet reinforcements between the lining and Shell Cordovan upper.


And there you have it, a deconstructed 93605. The fiberglass shank and fiberboard in the heel were a bit surprising but Florsheim had a price point that was more like modern Allen Edmonds than Alden. The upper stitching is amazing and all the leathers used in this shoe (upper, outsole, lining and insole), are high quality. I still think that even a 1980s Florsheim 93605 compares favorably to a modern Alden 975. And I own and like both.
I hope you enjoyed the article. Have a question? Leave a comment below.
Related posts:
 Florsheim Imperial 93605 eBay Guide
 Nettleton Traditionals 0208 Deconstruction
 Florsheim Imperial PTB Shell Cordovan 9D
 Florsheim Imperial Black Split Toe
 Florsheim Royal Imperial Concord 97604
 Florsheim Royal Imperial Stratford 96609 and 97606
 Florsheim Royal Imperial 97604 Restore
 Florsheim Imperial Kenmoor 93633 Forest
When I saw you posted something, I thought “Hurry, boy*, it’s waiting there for you.” (*My therapist sees me referring to myself like this as a red flag.)
Very cool and informative post. Love to see how these shoes were put together, and how they can easily be resoled.
Ha. Well done.
Extremely interesting post, David! I always look forward to your blog posts. I love my 93605s and it was fascinating to see the construction broken down this way. Thanks for sharing!
Thank you
It that horsehair padding?
Very surprised at the fiberboard heel stack, fiberglass shank and the fiber/cloth heel cup. Surely those weren’t the details in the older models… (?)
I have a shot 1960s (as I remember) 93606 that I might take a part to find out.
I read, l laughed, and l cried. Then l remembered that l have a cracking pair (not in the British sense) of 93605s…. so l cried again.
Thanks. I went through the 5 stages of grief once over a cracked pair.
I too have crack fear and am hopeful that Initial Nexol drenching is a ward against it. For equal parts aesthetic and crack protection I’m actually considering having brass eyelets retrofitted to a favourite pair of Alden PTBs (via Steve, of course).
Really interesting article, as ever…. also surprised at the fiberglass shank, I would’ve assumed metal. And gemming failure has now made me question the ‘last forever if looked after’ aspect of Florsheim level constructed shoes. Need to read more about that 🙂
Nexol = Lexol: I seemingly have a permanent mental block on the difference between real and fictional leather conditioner brand names
Ha
Thanks David for another very informative post. I had a “7 Degrees of Vintage Shoes Fans’ Separation” moment when you mentioned Steve from Bedo’s. Love watching his YouTube material, and perhaps someday I’ll ask him if he wants to work his magic on a pair of Bates Longwings (not Shell) of mine. The peppering of “Africa” lyrics was brilliant. I’m tetering on the edge of the Shell precipice. I’m a Shell virgin, but on the lookout. Thanks Again!
Thank you
Great educational resource, I doubt I’ll ever own Florsheim shells cost be damned. I do have a pair of calf cognac pebble grain bluchers that are sufficient for now.
Hi David,
I have a pair of 93606’s that have this problem. The shell is beginning to split where it is stitched together and around the eyelets. Also, the finish has degraded at the break point. This is a pair I bought years ago, before I knew much about vintage shoes. I’ve tried glycerin treatment and neatsfoot oil, but neither have seemed to arrest the problem. Is this a form of dry rot in shell? Is there anything else you known of that can be done to prevent further degredation?
Sorry. I haven’t had any success fixing pairs that have cracking.
Some cracking can actually be fixed, but not in a way that isn’t visible. I bought almost new 70’s Johnston & Murphy shell longwings. After moisturising etc. them well, both of them still cracked from the back of the heel (around 2 cm long cracks running down from the very top part of the heels).
My cobbler was able to stitch black half-moon shaped leather pieces on top of the cracks, and it looks pretty good as both of the shoes have them. We decided to use black leather, as it compliments the black sole edges and welt nicely!
Unfortunately, I have a pair of Florsheim Imperial plain toe bluchers, which have cracking around the eyelets (nowhere else!) and I’m considering having the same treatment done on the parts where the eyelets are: it should be possible, but I’m afraid that it will be more visible than the small patches on the back. The shoes are otherwise in basically perfect condition and it would be a shame to trash them!
David, I am currently experimenting with Resolene to slow/halt nascent cracking: Bought a v cheap pair of 1968 93605s which looked OK though with some dry patches; did several rounds of Bick4 then VSC before even trying on. Some tiny cracks appeared in the brogueing on either side of vamp where it flexed most when wearing. Then tried glycerin, which improved dry patches but did little for the tiny cracks – and some started to appear in brogueing on 1 heel counter. Then tried several coats of Resolene on just the areas with tiny cracks. I think it may have stabilized them. Obviously not a controlled experiment as I treated both shoes, but if it seems it has slowed the spread as I continue to wear them I will report.
Hi Leo, that seems like a reasonable fix. As for the eyelets, I have a pair with the same issue. I’m hoping brass eyelet grommets will both cover and protect them from getting worse.
Hi David! I got 2 questions:
How would you compare craftsmanship and materials quality of 93605 and Bostonian Crown Windsor longwing?
Have you ever encountered significant uppers stitching density differences between 93605s?
You’re an animal. Where’s my shake?